Create 3D Art with Print, Cut and Draw Features of Cricut

Sunday, May 12, 2019

 Craft and Create with Cricut 

Today is a big day for many reasons. You will be treated to eight new craft projects using a Cricut to make flower themed crafts and decor from the Craft and Create with Cricut Challenge. Below you will find my quick 3D Art print, cut and draw project. Please be sure to read all the way to the end where you will find 7 more crafts you will certainly want to Pin to one of your Pinterest Boards.


Make 3D Art quickly using Print, Cut, Draw Features with your Cricut Maker.

Life can be crazy

During the last year my family suffered several severe health scares. We also celebrated engagements, our son's wedding and most recently our Godson was married in April. In Between the excitement shortly before Thanksgiving while ice skating  I suffered a broken leg. As I say my leg pirouetted and I did not causing a spiral fracture requiring surgery. Now I am still recovering from becoming a human tripod for several months but the prognosis is good. It is just a slower process than I expected. Which is why it is so important to stop and take in the beauty of the world around us. Last year my own personal journey of twist and turns is inspiration for this cute little 3D art print.

How to make a 3D Art project using glue pads Draw Feature along with Print and cut using your Cricut Maker


Supplies

1. Printer
2. Cricut Maker or Explorer
3. Shadow Box Frame 6 X 6 (opening for art)
4. Glue Pads 
5. 20 lbs. Copy Paper or Scrapbook Paper (remember it must fit in your printer
6. Cricut Spatula (recommend to prevent curling)
7. Light tack Mat from Cricut

Some ot the Supplies used to make a fast 3D Art Decor with your Cricut Maker


Steps

After you gather your supplies place your paper in your printer. When your Cricut prompts you to print select your printer and then press print. 
The printing is complete simply place the paper in your upper left hand corner of the light grip mat. follow the prompts on your Cricut screen.
Next release the mat from your machine, using the spatula suggested gently lift the paper and fresh cut flowers in the Ball jar to set aside.


Cricut Maker making quick work of the print and cut feature.

Now place a second piece of 20 lb copy paper on a light grip mat to draw. Be sure to add a fine print black pen to A for the draw portion, B should have a blade to cut out your background. again follow the prompts on your computer or tablet to complete this step. 
Remove the same way you did above.
Open frame back/
Place glue tabs on back off  Ball Jar Flowers.
Arrange the way you like.
Place your 3D Art in the frame, close the frame and enjoy. 
The frame I purchased is a Shadow Box Frame which comes in many sizes.

Love it, Pin It

Stop and Smell the Flowers 3D Art project made quickly with a Cricut Maker and a Printer.

I am thrilled to be back sharing projects you can create. This is a quick one which will be perfect for hostess, teachers, thank you, Mothers Day gifts or a cute spot of decor in your home. Please be sure to visit, Pin, and share the 7 additional creative bloggers who shared their talent with us today. Their links are conveniently listed directly below. 

Let Your Creative Spirit Dance,
Karen Marie

  Pinterest   Facebook  Twitter   Instagram   BlogLovin


8 Flower Ideas made with Cricut for the May Create and Craft with Cricut Challenge


EasyPress 2 Heats Things up with Cricut

Friday, September 21, 2018

Sponsored Post

EasyPress 2 Heats Things up with Cricut

Hello Darlin! This week Cricut provided me with a new EasyPress 2 Medium (9X9) to create a project within Design Space using their StrongBond Iron-on. One of my favorite ways to decorate during the colder months is snowflakes. Lets see how easy peasy this project will be for you to recreate.


Since the EasyPress 2 is heating up even faster than ever it had me thinking the opposite direction. Winter! My favorite gift or decor item for Winter is snowflakes or snowmen. These delicate one of a kind gems glisten through the sky making even the gloomiest of day sparkle. The snowflake pillow project material and directions are located here in Design Space. 

Dragonfly & Lily pads contains Affiliate Links to the items used in this blog post. When you purchase through the convenient links we will receive a small percentage of the sale with no additional cost to you. 

Supplies
 

Cricut StrongBond SportsFlex Iron-On Metallics Sampler
12X12 Green Cutting Mat
Fabric of your choice or pre-made Pillow Cover 
(amount and size will vary with your pillow. This was 12X12)
EasyPress 2 9X9 or Medium
EasyPress Mat size?
Sparkling Snowflake Layered Card(#ME2F767) Anna's Christmas Card
Weeding Tools


While using Design Space from Cricut take it a step further to check your design by using the patterns for backgrounds even if you're not printing. Look at the realistic image that was created to assure your choices during the process. 


Anna Griffith designed a beautiful snowflake layered card, a perfect way to show you how easy it was to adapt a Design Space project into a different project. With her design I used one layer sliced off the card, deleted the score line and changed the size into a square.  Strongbond Iron-0n metallic is a the perfect way to add decor to a pillow.  It is guaranteed for 50 washings when used as directed.


Cricut produced a new EasyPress 2 which heats up faster with the new ceramic coated plate creating even heat for perfect projects. Speaking of surface the holder has a new easy to rest shape and I haven't even shared the best part yet. The EasyPress 2 comes in three sizes, S (6 X 7 ), M (9X 9), L (12 X 10). It has a USB port for easy updating, a sweet raspberry color, and the temperature raises up to 400 F. 


Come back each month for a new pillow cover design totalling 12 for the year. Storing 12 pillow covers is far easier than storing 12 different pillows. Keep reading to see what design is used for the next month. Also watch for a tutorial for easy to sew pillow covers out of your favorite fabrics, then you will be able to create right along with me. Please tag me on Instagram so when you create your pillow cover I will head over to comment on your project. Fly on over to follow Dragonfly & Lily Pads FaceBook Page where I will feature your pillows with credit to you.

I hope you enjoy the project please Pin, Pin, Pin!


The best part of this monthly post is all designs will be linked to the Cricut Design Space for easy access to create the project yourself. Join me in October for the next pillow cover creation.     

        Pinterest   Facebook    Google +  Twitter   Instagram   BlogLovin

~ Let Your Creative Spirit Dance  ~ 
                                                     Karen Marie


https://tap.fit/r1hzVihu7

Dodecagon Votive Candle

Wednesday, February 21, 2018

Dodecagon Votive Candle Holder 

Good morning friends! The Create With Cricut Challenge Group chose cereal boxes for the mystery material to use with our Cricuts this month. 

Dodecagon Votive Candle Holder Made with Cricut Maker and Cereal Box.


Felt Flower Power

Tuesday, January 30, 2018

Felt Flower Power

Darlins so much is going on around here at Dragonfly & Lily Pads lately. Be sure to read all the way to the end of this post to pop on over to my three friends who rounded up more than 40 bloggers to post a project using felt with a Cricut machine. I used my Cricut Maker to create a 15 minute Craft Lightning Felt Flower Power. Can you tell Spring is already on my mind? Is it on Yours? This project is perfect to make for gifts, decor, party decorations, teacher gifts, even the kids could do this. OMG! Wouldn't these be great to bring to a nursing home to brighten an elderly persons day.

Felt Flower Power Cricut Maker Flowers made with glue, and chenille pipe cleaners in less than 15 minutes.

Felt St. Paddy's Day Pin

Wednesday, January 17, 2018


Felt St. Paddy's Day Pin

My Cousin from Ireland sent me pictures along with a video about St. Paddy's Day. She lives in the town my great-grandfather was born in before emigrating to New York during his adult life. St. Patrick's Day is a National Holiday in Ireland. It is a day the whole town goes to church, has a parade and of course has a pint or two. I am grateful she shared traditions held in our family half way across the world.  Featured on the lapel of jacket and coats is a boutonniere of shamrock. 


Felt St. Paddy's Day Pin made with Cricut Maker, Pinned on jacket

Vintage Heart Valentine's Garland

Tuesday, January 9, 2018

Vintage Heart Valentine's Garland  

 Happy Birthday to me because this machine is amazing. I bought the Cricut Maker for as a birthday gift to myself. Did you see the picture on Instagram today?  I just opened the box. Within moments I was cutting felt which took less than 15 seconds to cut eight perfect hearts. OMG! Thursday I will provide a detailed tutorial for the vintage heart Valentine's Garland with link to this post.
 Forty Three makers are spending the week sharing Cricut Valentine's projects with you. You will find the remaining projects included at the end of this post. Please show us some love by pinning, commenting and sharing.

Vintage Valentine's Garland made with Cricut Maker out of felt hearts and linen doily trimmed coasters

Dollar Store Christmas Wreath

Tuesday, December 5, 2017

Dollar Store Christmas Wreath

Day five of the 12 Days of Christmas is the Dollar Store theme project. This one gives you bang for your buck. Insert Chuckles here! This time we will learn how to take your creativity to tweak a Hula Hoop to make a big wreath for Christmas. The bow is ribbon from last years Christmas clearance sales. Lets save money while learning how to make a large wreath from the Dollar Store!


Dollar Store Craft Christmas Wreath with Happy Holidays ornament

DIY Winter Glam Decor

Monday, November 20, 2017

Winter Glam Decor Tutorial 

Today using antique Mod Podge with newspaper we are going to learn how to make a snow man top hat with a glamorous twist. This project is fairly easy but takes some time drying time. I split up the project between one football game (the Bears lost) and let it dry over night then started after breakfast. 
 More Good news for you my darlings! Together with a group of amazing bloggers we are sharing posts together to give you the best ideas based on decor, crafts, recipes, and shopping guides. 

DIY Glam Winter Decor Close up of Snowman Hat covered in Paper Mache with a touch of gold ribbon and silver pom poms


Woodland Glam Holiday Decor

Sunday, November 5, 2017


15 Minute Holiday Decor

It is time again to share just 15 minutes to brighten your holiday decor with three simple items. This quick three piece decoration will create a sweet corner with tiny lights dancing through glass and pine cones. 

Craft Lightning Holiday Decor made in 15 minutes or less, Lights, container, Pine cones

A Box with a Purpose

Thursday, May 25, 2017

Thrift Store Decor Upcycle Challenge

Thrifty to Nifty Decor

Thursday, March 23, 2017


Thrifty to Nifty Decor

 Is a challenge we face everyday as we decorate our homes on a budget. This group of talented bloggers take thrifting to a new level. Dragonfly & Lily Pads has decided to join them to bring you a wealth of information to use in your home. Today I am sharing a wreath that I bought a few months back for Fifty cents. Learn how to make yours below along with Twenty Nine more thrifty decor items.

Thrift Store Decor Upcycle Challenge


The Rules:
  • Upcycle an item(s) from a thrift store, resale store, or garage sale into a new piece of decor.
  • There's no monthly theme.
  • There's no budget to stick to.

Meet the Hosts

Amanda | The Kolb Corner    Erlene | My Pinterventures    Kim | Made in a Day Dru | Polka Dot Poplars    Maureen | Red Cottage Chronicles    Pili | Sweet Things Shirley | Intelligent Domestications    Debra | Shoppe No. 5    Marie | DIY Adulation Chelsea | The Johnsons Plus Dog    Jes | My DIY Envy    Ann | Duct Tape and Denim Molly | Just a Little Creativity    Ashley | 3 Little Greenwoods    Kimm | Reinvented Kim | Farmhouse Made    Victoria | Dazzle While Frazzled    Sara | Twelve on Main Chelc | Inside the Fox Den    Sue | A Purdy Little House    Michelle | Our Crafty Mom Sherry | Savvy Apron    Jennifer and Vicki | 2 Bees in a Pod    Lora | Craftivity Designs Ali | Home Crafts By Ali    Denise | My Thrifty House    Colleen | Life on Kaydeross Creek Toni | Small Home Soul    Jeanie | Create & Babble    Jeannee | Shepherds and Chardonnay Michelle | Michelle James Designs    Medina | Grillo Designs    Karen | Dragonfly & Lily Pads

Make sure you follow our board on Pinterest for more upcycled decor inspiration!

Welcome to Our Fall Home Tour

Wednesday, September 21, 2016

When a new season begins it is time to celebrate. Hello Fall! The best way to welcome
fall is to share our home tours with you. Welcome to Our Fall Home Tour Blog Hop starting this morning with our Tour Director Debbie author of Chatham Hill on the Lake and Assistant Tour Director Karen of Dragonfly & Lily Pads. Keep following throughout the week as several gracious Tour Guides through out the welcome mat for all of us to see their beautiful homes.
Today we hope you stop by at:Festive Fall Home Tour at Chatham Hill on the Lake www.chathamhillonthelake.com
Dragonfly & Lily Pads Fall Home Tour www.dragonflyandlilypads.com

Energy and Water Inspired Room Refresh

Thursday, February 11, 2016

Sponsored Post
   Darlin's this post has been inspired by the colors of Nautica at Home Paint. They provided me with a fabulous print of a picture I took this summer and a +Menards gift certificate to cover paint, rollers, tape, and tarps. Here are the colors Prince Charming and I chose for our son's room at our lake home. Nautica makes it so easy their designers choose colors they picked from the picture to create a color palette for us. We considered them while making our final selections. 
These are the paint swatches from Nautica At Home Paint of the colors we chose for our Energy and Water inspired room Refresh. Stone Washed is a white with a base of gray and beige, Vessel gray which was perfect for the hit of 1959 boat. Dinghy is the blue color chosen  for the style of the stripe on the boat. The Caspian Green captured the nature around us in our inspiration picture.
Stone Washed was our final choice for the main walls in an eggshell finish. The remainder of our paint colors Vessel, Dinghy, and Caspian Green are in Semi-gloss style finish to reflect light. 
Boy's room at the lake house is needing a lift. Daybed, Nautical Nod Dresser,  One small window
 This plain Jane is how the room looked before. Notice the Daybed Knobs!
What do you do with a dark Loft and Three Strip lights? Brighten it up!
 This corner and loft are so dark the picture of the 1959 Featherlite boat inspired me to step out of the darkness. Wait until you see the after picture of this space.
Antique Full bed found at Restore for $15.00. Desk hand made in Kansas City, Missouri, Boy's Room at the lake
 The bed found at the local Restore. The handmade desk is all the way from Kansas City, Missouri. That is a long story.
Day bed and painting from the area in dark corner of the boy;s room at the lake.
This painting was sold to me by the woman who received from her family as a wedding gift for ten dollars. The Daybed needs some flower removal.
Now we have the reasons for changing some of these layers. It is time to show you how in less than two days Prince Charming and I painted this room with Stone Wash Nautica Eggshell Paint.
Energy and Water Room Refresh, Daybed corner is bright and full of new decor thanks to antique shops, Goodwill, and Menards
 I bought a couple items from +Menards that I think will surprise you. The two tan pillows in this picture along with a deck chair cushion on the back of the daybed were all at the South Haven, MI Store. Do you see the Caspian Green in this picture used twice? I sanded the flowered knobs, taped them with frog painters tape and peeled off the tape. If I knew it would be that easy I would have done it a long time ago. The second place in on the box in the corner of the picture bought at a Goodwill.
Nautical Nod dresser fits right in all brightened up by a few items I picked up for free. Use what you have in new spaces. Print free from Images, Puppy plate a gift, cup has a history on the lake, Basket is an ice bucket but, but together they are decor.
 To see the transformation this dresser made click on this link Here.
Refreshed decor from a puppy plate the looks like my Cricket and a cup given to me by a neighbor on the lake with the incredible patina. The cup was used for drinking out of the water pump in the yard.
 Two of my favorite items in this room cost nothing. The cup came from a neighbor on who has lived on the lake for three generations. They used it to drink out of at the water pump. The plate my sister in law bought be at a garage sale as a surprise. The puppy looks just like my Cricket.
Pointing to the Lake a great sign for under $5.00 at Menards. The Green pillow with Fringe has a $1 scarf wrapped around a 2 buck pillow. Stone Washed is the Nautica At Home Paint color.
 The paint went on smoothly and the coverage was great. I will absolutely use this paint again. This room is now a place I am proud to have added the layers of our life into Nautica at Home Paint inspired room. The Lake sign on this wall was found for under $5.00 at +Menards too.
Fish Bait Light changed out for a strip of lighting make the room brighter as the light bounces off the Semi-Gloss finish of Nautica At Home Paint Vessel and Dinghy.
The light dancing from the Edison bulb which is centered in the bait basket has electrical cords wrapped in the heavy rope. We purchased this from a vendor at +Randolph Street Market Chicago 
The loft of the Boy's room at the lake is much brighter with a new light and three paint colors from Nautica At Home Paint. Vessel is Gray, Dinghy is Blue and Caspian Green is on the deck. All these paints are in a Semi-Gloss finish to reflect the light.
Nautica Semi-Gloss Vessel, Dinghy, and Caspian Green created a reflective surface which certainly brightened the darkest space. This part of the room has quite a bit of energy inspired by the picture below.  The walls are the colors of the boat. The floor of the loft is inspired by the colors of nature in the picture. The old Fog Horn on the desk and the wool plaid blanket at the foot of the bed add more layers to the room. Prince Charming purchased them as a present for me on my birthday at +Randolph Street Market Chicago. 
The Room Refresh is finished with its Energy and Water inspired room. Print of a picture of our 1959 Boat was the inspiration from Shutterfly.
Nautica At Home Paint truly inspired this room for our son's, from the maiden voyage of our 1959 boat in a lake filled with the energy of many people who have spent time at the lake over the years. The picture started and finished the room off perfectly. Nautica At Home Paint has amazing colors. I chose to make the stripes of the boat in the loft. The paint went on smoothly and the stripes came out crisp and clean with the use of Frog tape.

  You know what is even better a sponsored post? 
You having a chance to win $100.00 Menards Gift Card from Nautica At Home.


~ Let Your Creative Spirit Dance  ~

Until Next Time Happy Creating,         

    Karen Marie

More Posts to Enjoy:

Please click on the title below to see the post.


Swap It "Light" Its Hot

Friday, October 9, 2015

Hello, Darlins'! 
 Miss Charlotte author of Ciburbanity asked me if I was interested in participating in the Swap It Like Its Hot group of bloggers she gathered. I was ready and willing with a quick yes. This is a fun game of chance and thinking outside of the box (Literally) with a group of creative bloggers. I sent a box of treasures purchased from a local thrift store to my dear friend Michelle Beaton author of Weekend Crafts. If this worked perfectly you have already been to visit Weekend Craft  to visit Michelle. If you missed the post click on the name of her blog above 
I received a package from another good friend Evey. She sent me what is pictured below. Evey is a busy lady, but you can always find her at Evey's Creations. I think she is going to be surprised how outside the box thinking, a few stash supplies and $2.24 dollars created this group of decor items. Please click on Evey's blog name in this paragraph or at the bottom of this post to follow along the "Swap It Like Its Hot," trail of packages.
The pile of goodies includes a nineteen cent circle of wood I forgot to mention earlier. Did you see the smoke rising from my town? There was a lot of thinking going on to get to this point. The picture below gives you the start of a plan for the tile plaques. I only broke one of the tiles taking them out of the frame. The other two are safely in my stash for future projects.

Halloween Decor in a Flash

Friday, September 11, 2015


I was invited by my blog buddies to whip up a craft for Halloween in less than 15 minutes. My answer was obviously yes to my clever crafty mates. Thank you for inviting me to Craft Lightning The Country Chic Cottage.net  30 Minute Crafts.com and +100 Directions.com
Now here is the thing. I am rather a Glenda the Good Witch kind of girl. I don't like haunted houses, prefer no masks, and please Lord do no touch me with a mask on. It will not be a pretty moment for either of us. Someone might even get hurt and it won't be me. 
Thank goodness I love trick or treaters, handing out candy and carving pumpkins. Good old fashion apple cider, the colors of the fall and the pictures of children on a pile of pumpkins just seem to be the best photographs. 
I tend to be a work smarter not harder girl making this challenge perfect for my brain.  First up a creative way to use what you have and decorate quickly.
I bought this darling drawer on clearance for $5.00. I had the greens already in the drawer with a foam. This Decor was created for the Chicago Randolph Street Market Midwest DIY Bloggers Roundup (Click Link Here) I created and hosted in August.  My dear friend Sally Schwartz owns the Market and graciously allowed us to meet at the RSM for two days. 

Boys Dresser to Nautical Nod

Thursday, August 20, 2015

This month the Fab Furniture Flippin Contest is titled the "Icing on the Cake". I choose to add some shine to our boys childhood dresser. The people great people at D.LawLess Hardware sponsored this contest. They graciously provided the hardware for my boys dresser to help this piece of furniture grow up. Now this Nautical Nod is fitting for my sons room at the lake house. 
As you can see here this dresser is tired. We bought this when our first son was born 29 years ago. Did I just say that out loud? Well! I was very Young. 
Thank you to our hosts this month
Along with the creative team

The Sponsor this month D. Lawless Hardware from Olney, IL
This post is sponsored, but all the opinions are my own.
 Artesia Knob - Sedona Bronze 45mm L-P17020C-SBZ-CArtesia Knob-Sedona Bronze
                            L-P17020C-SBZ-C
Thank you for the lovely knobs chosen my son A. for the dresser from
 D. Lawless Hardware. I am very proud to have a great supportive company with superior products in the same state that I live. Illinois is certainly having a tough go of it right now. I appreciate the company for sticking with us during the hard times. 

DIY Pillow Painting Design

Saturday, August 15, 2015

    I am sharing the DIY project I will be demonstrating at the Randolph Street Market First Midwest DIY Blogger Roundup. DIY does not have to be with power tools. I do love my power tools and building. Huge Smile! I chose to show you how you can add the feeling home to any space without a huge expense all by yourself. 
We are focusing on things to make for Back To School. Now remember back to school affects everyone. The small ones starting school, middle school taking on more responsibility and high school graduates leaving for college. Each one of these events also affects parents, grandparents, and even a homes function.
I am going to use a pillow form, metallic fabric paint, and stencils. You will also need a piece of cardboard to place in between the pillow form to keep the paint from bleeding through to the other side.

Top Of The Mornin' To You

Saturday, February 28, 2015

Top of the Morinin' to you! I know my last name does not scream Irish but I am proud of my ancestry from the Emerald Isle. Have you ever met an Irishmen who is not proud?  I thought I would share a small vignette I gathered to celebrate the up coming St. Paddy's Day Holiday. My Great Great Grandfather Is Patrick Condon of Cahir, Ireland. I have had the honor of traveling to the town. While I visited I met the family member still running PC Condon's Pub in Cahir. She is a delightful lady who welcomed me took me on a tour of the town. Taught me about where she lives, exchanging family history.I now have contact with more family. I am looking forward to meeting one day soon.

Hearts A Flutter Valentine Decor

Thursday, February 12, 2015

Love is in the air which means my heart is all a flutter. While shopping for craft room storage at a  half price sale in January #AHeapOfChangeChallenge. I wandered by the valentine displays as I was piling up the first cart with items I deemed necessary to an organized craft space. (Squirrel) I wanted to make a decoration with materials slightly out of the box. As Prince Charming headed for the second cart I chose a bunch of silk roses in ivory and pink, 2 cardboard hearts and valentine card stock. I already had bakers twine in red, pink and white at home. After the cashier rang up our two carts of sale items we filled the car and headed home.
I will be posting about the storage and organized craft room reveal soon.
Roses, Ivory, White, Cardboard Hearts, Hearts a Flutter Valentine Decor
Can you imagine how these rose petals are going to look with Mod Podge adhering them to the card board hearts?

Fall Mod Podge Pumpkins

Tuesday, November 4, 2014


   A recent Fall trip to our lake home was not providing the desirable effect. Cold, wind, and rain were dampening my mood. Do you remember my Mod Podge Miracle post?
 My Prince Charming had to drive to the store. Normally I would skip the grocery store to stay lakeside but, not today. He offered to go to our local +Michaels Stores with me, then I could find a creative outlet to brighten my gloomy day. Now a trip to a craft store with my guy, may not be every girls cup of tea but, I was happy to get to spend time with my busy man.
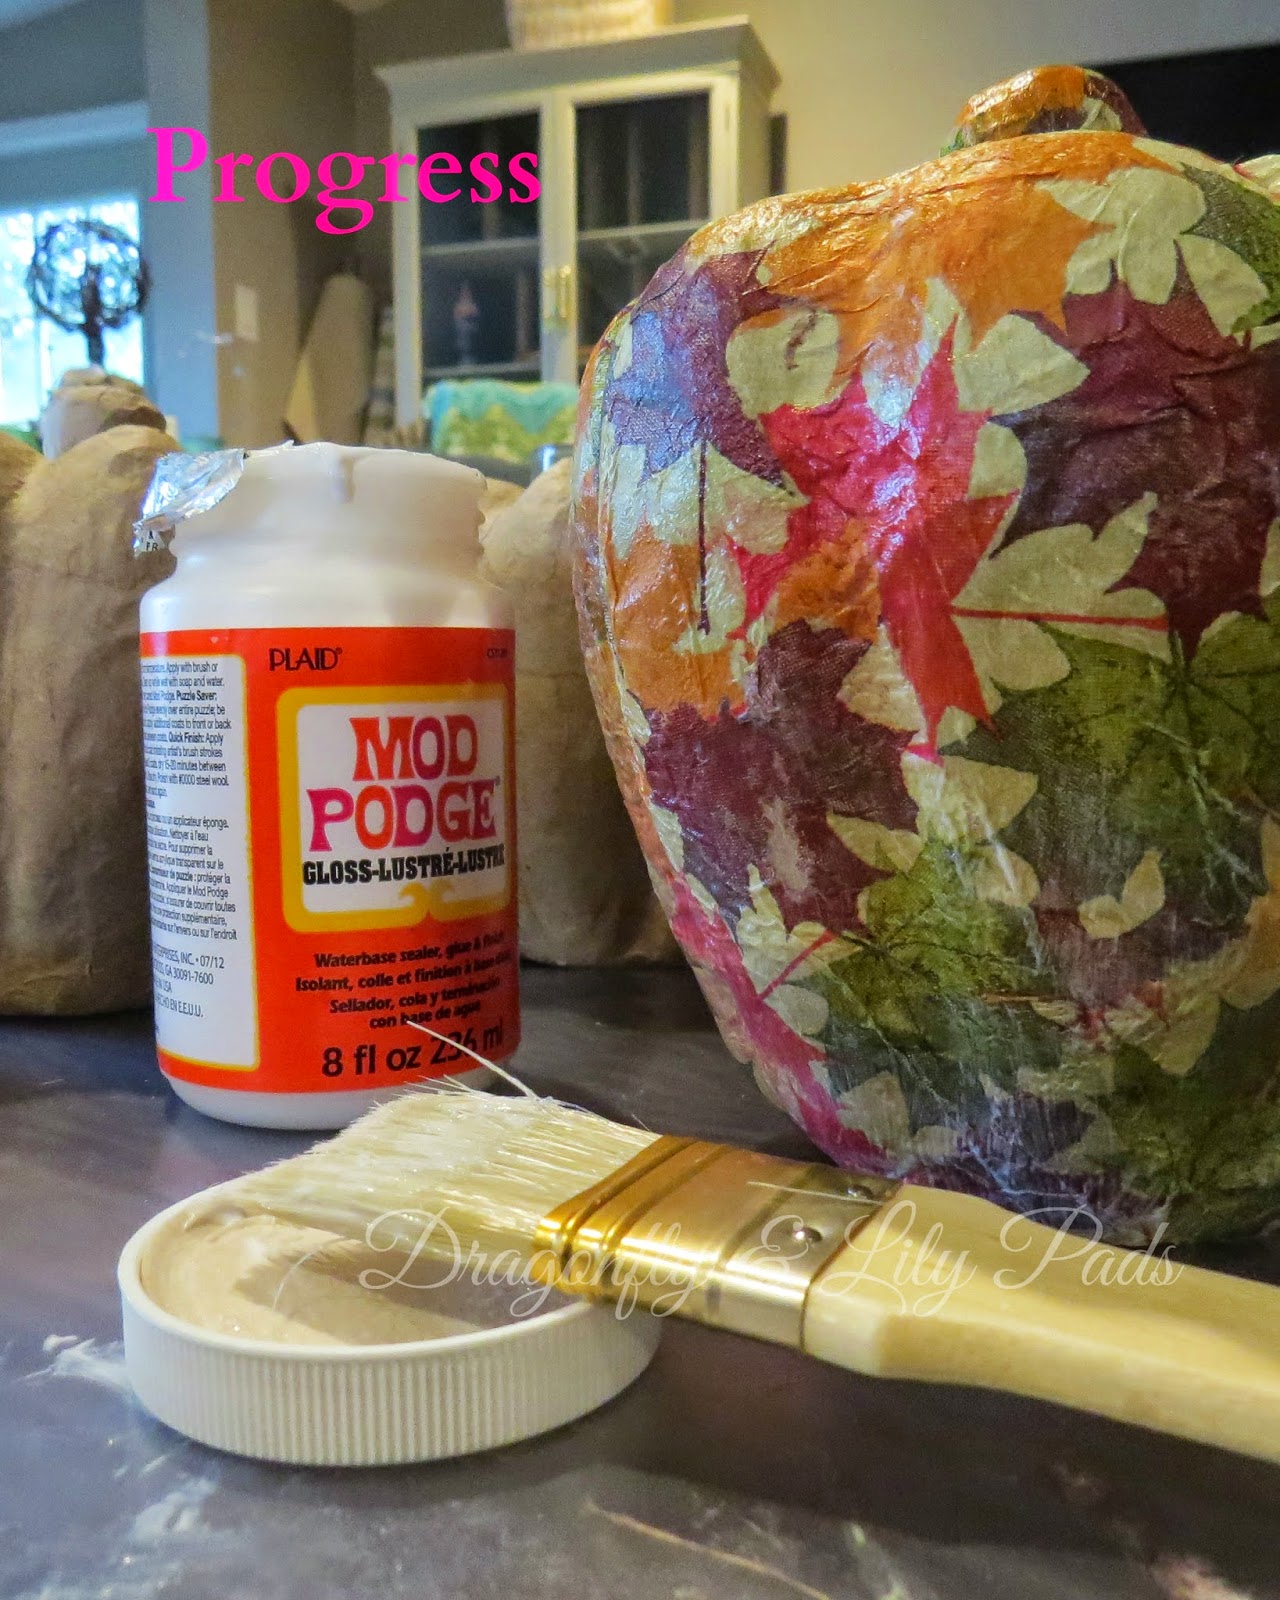
  I spotted an affordable, easy Fall craft project, on sale in the first aisle. This display of sale items led to Fall Mod Podge Pumpkins. We bought two items on our shopping trip paper pumpkins, and cocktail napkins for this craft. We all know I could never walk out of a craft store with two items. Two carts were full! Those items are for future posts. Hey! It was a Clearance Sale.  I already had the paint brush, and Mod Podge from previous projects. 
Paper Pumpkins, Paint brush, Fall Leaves Paper Napkins, Fall Decor Fall DecorationMod Podge, Paint Brush, Progress, Mod Podge drying on the Fall Pumpkins