Tis the Season to find creative ways to give gifts to friends and family that are well made with love of course and useful. In this economic time we are all looking for ways for our gift budget to stretch as far as we can but we still want a thoughtful gift. Last week I went to the Dollar Store to see what I could find for my gift giving project this year. I have to say the thought crossed my mind to use one of the many cost effective gift ideas I have seen on the other blogs, Pinterest, Facebook, Google+ but , I wanted an original idea.
I shopped around and found silver, metal, mesh, pencil holders. Ahh! This would be my container for the gift. Then what would I put in the holders along, with adding a my creative design, to make this a special gift?
I spotted the butterfly type paper clips 8 count in the large size and 10 count in the smaller size.
The last few items I need for this gift I already have in my stash at home. Yippie! I have a plan, a nice gift to give, with a little of my creative love thrown into a pencil cup holder.
Can you guess what the gift is yet? Hmmmm. By the way the last few items are scrapbook paper, glue, twine, and I will need to purchase some tulle to use for wrapping because I think it will add a nice touch. I will show you that later on another day.
 |
| Yard Sticks have Character |
Now I need to measure the large and smaller clip, to figure out how much paper I will need, for each size clip.* Disclaimer your paper clips will need to be measured because sizes will vary.
Here are the measurements for the two size clips I bought at the Dollar Store. The
Large is 1 5/8" wide, the
smaller one is 1 1/4" wide. Now I need to measure the length of the paper I need for each,
after some trial and a lot of error. I found that cutting a strip the width of the paper, wrapping it around the clip, making a indent with my finger nail by pressing the paper tight into the top of the clip. This gave me a good place to start. Then I cut the paper a few times until I found just the right measurement,
2" for Large, and 1 5/8" for the small. Out of one 2" strip of paper in 7 different color I was able to make 35 clips. Out of the 1 5/8" strip of paper also using 7 different colors I made 49 clips.
 |
| I bought this at Micheal's on Sale |
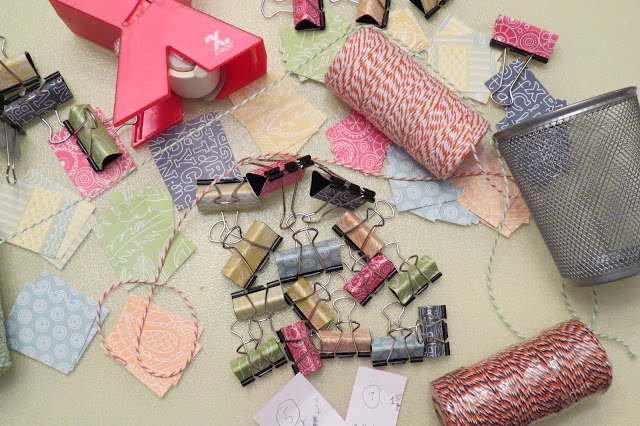
I used my paper cutter to cut out the sizes needed. You can use scissors but it is a lot of cutting. I thought about using my Silhouette paper cutting machine and might in the future now that I have the measurements calculated. I plan on cutting all of my paper out mixing the colors and patterns. I used 7 smaller patterns because large patterns would be lost on this size project. I choose
paper not card stock, because it would be to thick to work with folding around the clips. Below is an example of the papers I used. I thought the patterns and colors would be a bright spot on a desk or in a craft room.
 |
| Bright and Cheerful Colors |
My next step is covering the black clip with the scrapbook paper. I uses E6000 glue on the Large clips, because the paper did not fit in my Xyron. Bummer, I should have bought the bigger Sticker maker. Christmas present for me??? I did use the Xyron permanent sticker for the small clips. It took less time, was less mess, and turned out nicer, in my opinion. This picture shows the paper cut ready to be glued to the clips.
 |
| How do you like the finished Clips? |
Now I filled the pencil holder with 10 small plus 4 large Fancy clips. Add some Colorful twine to the container. I will wrap with the tulle, twine and a gift tag later. Here is the final product. Would you like to use these on your desk? Some people even use these for clips to close open bags of snacks,, or chips too. Then I would keep the container in my kitchen, near my Ziploc Bags, Foil, Wax Paper.
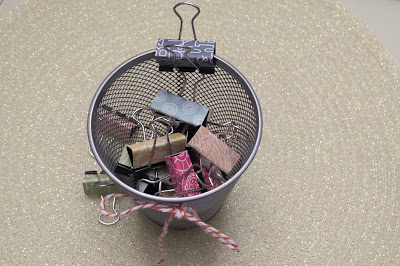 |
| A view from the top |
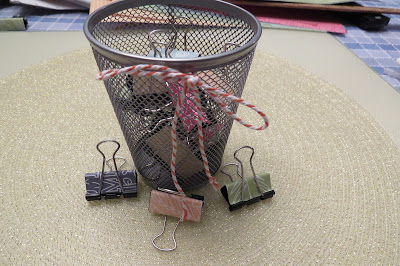 |
| Front and Center |
When ever I start project the ideas still bounce around in my head. I am going to make a few variations of this project in the near future. Do you have any suggestions? I already know I am skipping the E6000 glue on this next time. Great product but not the right one for this application. I also tried Washi Tape on this one and that was not the best for this project either. I am thinking of attaching magnets so you can use the clip to hang something. What do you think of that idea? Share your thoughts on these ideas or any suggestions. I look forward to seeing your comments.
I am Blessed my family is at home. My cousin, with his family will be here tomorrow.
I am a happy girl!!!!
Happy Thanksgiving!
Here is a list of items used and where I purchased them:
Dollar Store
1 package Butterfly paper clips Small 10 count $ 1.00
1 package Butterfly paper clips Large 8 count $ 1.00
1 Pencil Cup Holder ( Wire Mesh Silver) $ 1.00
Michael's
I used Xyron Permanent Sticker
Scrapbook Paper
E6000 glue
Steals.com
Twine
http://wonderfulathome.blogspot.com/2013/12/wonderful-wednesdays-15.html?showComment=1386202147418#c2527398334266671696


