Golden Dodecagon Votive Candle

Sunday, July 15, 2018

Golden Dodecagon Votive Candle

Today is the day when several bloggers join in a Craft and Create Challenge of the month. This month the theme is use your imagination. A few month ago this Dodecagon was made out of a cereal box. My soon to be daughter in law was pricing these votives for the wedding. $$$$$ The test project proved to be an cost effect design for decor for the wedding day.

Supplies

Metallic 12" X 12" Cardstock
Tiny Zots
Cricut Mat
Cricut Design Space
My Cricut Design Space has Dodecagon Votive and shapes.
Matte Gold Acrylic paint
Paint Brush
Battery Operated Candle
Cricut Maker


Above is an example of your computer screen while cutting and scoring in one setting using the Cricut Maker.


The scoring lines along with crisp cuts make an easy quick process to complete the craft. This project is not in my While in my craft room I cut the votive candle then brought them with me on the weekend.  Where is your favorite place to craft and create?  I love creating at the lake house. Please visit our Summer lake house tour. I am sure you will agree.

An easy way to bend straight tabs with the card stock my tip is to use your Cricut scrapper.


Once you fold all your angles become clear. I used double sided tape which fell apart from the heat and humidity the first one I assembled. This turned out to be a gift since I dry brushed the white interior with a matte gold then used tiny Zots to complete. The Zots worked much better and the brushed matte gold amped up the presentation of the votive.

AA few months ago cereal boxes proved to be a testing ground for making Dodecagon votive. For detailed directions follow this link to the tutorial.  It has a strong structure for battery operated candles. The price on one of these votives is costly out of metal painted gold. Each votive cost no more than two dollars with the battery operated candle.That is quite a savings!

Imagine the many parties you could use this Dodecagon Votive Candle Holder.
Below is a Pinterest image to include on your boards.


Lets Get Social
            
        Pinterest   Facebook    Google +  Twitter   Instagram   BlogLovin

~ Let Your Creative Spirit Dance  ~ 
                                                     Karen Marie

Be sure to visit my crafty & creative friends. I hope you enjoy the projects and Pin, Pin, Pin!


How  to Use Cricut for Branding - Create & Babble ⋅ Faux Leather Cactus Key Chain - Real Girls Realm ⋅ Teacher Award Ribbons - seeLINDSAY ⋅ Decorated Gift Bags with the Cricut Maker - Cookies, Coffee and Crafts ⋅ How to Make Leather Earrings - Refresh Restyle ⋅ Hello Gorgeous Makeup Bag - The How-To Home ⋅ How to use a lightbox for tracing - Smiling Colors ⋅ Personalized Baby Girl Cricut Card - The Inspiration Vault ⋅ Mermaid Glitter Wine Glasses - Daily DIY Life

Dodecagon Votive Candle

Wednesday, February 21, 2018

Dodecagon Votive Candle Holder 

Good morning friends! The Create With Cricut Challenge Group chose cereal boxes for the mystery material to use with our Cricuts this month. 

Dodecagon Votive Candle Holder Made with Cricut Maker and Cereal Box.


DIY Winter Glam Decor

Monday, November 20, 2017

Winter Glam Decor Tutorial 

Today using antique Mod Podge with newspaper we are going to learn how to make a snow man top hat with a glamorous twist. This project is fairly easy but takes some time drying time. I split up the project between one football game (the Bears lost) and let it dry over night then started after breakfast. 
 More Good news for you my darlings! Together with a group of amazing bloggers we are sharing posts together to give you the best ideas based on decor, crafts, recipes, and shopping guides. 

DIY Glam Winter Decor Close up of Snowman Hat covered in Paper Mache with a touch of gold ribbon and silver pom poms


DIY Holiday Candle Wrap

Saturday, November 11, 2017

DIY Holiday Candle Wrap

  Learn how to create this simple addition to your holiday decor in a minutes by adding a wrap to your candles for the holidays. These temporary wraps can be used for many different decor options. I designed these stars with my Cricut Explore Air 2. This darling decor project can be used for your home or any of your friends and family as candles always make wonderful gifts. 

 Lorene from Remodelaholic has lead a crew of talented bloggers to  give you 26 Creative Christmas project tutorials.


Be sure to hop over to these 26 amazing blogs, pin these 26 great tutorials to your Pinterest boards. The remaining 25 follow my holiday candle wrap tutorial


Supplies for Candle Wrap

Glitter Paper 12 X12Measuring Tape
Candle (use candles with no flames)
 Removable Adhesive
Optional Cricut Machine or Scissors and Ruler (to make template)
Exact-o knife


Tutorial DIY Holiday Candle Wrap

Measure around the candle to determine the size wrap you need for your candle. Mine was 9.58' adding enough to slightly overlap completing the design. Then chose the height that is pleasing to your eye.  


 There are several holidays where stars are an appropriate decoration. Do you love interchanging decor items around the house? I 💓to swap decor from rooms to different houses. 


Weld the stars together by dragging your cursor across a horizontal line of stars with the tips of the the stars overlapping. When the stars are framed by a blue box hit the weld button with your cursor. Whala! 
Follow the steps on your computer screen to complete your cuts making sure to chose the Glitter Card stock. Place your material on your cricut mat carefully matching the edge to the lines on the mat. Place the mat on the Cricut then press the arrow to guide the mat in to the machine. Now that your ready wait for the start button to flash as well as your computer screen will prompt you.  


If you look closely you can see the stars are cut out and ready to be reverse weeded. Reverse weeded means you take the waste off first.


Be gentle as you remove the stars from the cutting mat. The DIY holiday candle wrap is delicate between the stars. Gently wrap the band of stars around the candle securing with removable adhesive.


 My small vignette of diy holiday candle wraps now grace my coffee table in the sun room. I am not ready to decorate for Christmas yet since I will be hosting six family members for a fun Thanksgiving visit. I am grateful my sister and brother in law host our Thanksgiving meals for the family.

I hope you love this quick project as much as I enjoyed creating this tutorial. If you 💓it Pin It!


Question of the day- What is your favorite Christmas decoration? 

Lets Get Social
              Pinterest   Facebook    Google +  Twitter   Instagram   BlogLovin

~ Let Your Creative Spirit Dance  ~ 
      
                                                     Karen Marie
Now darlin's don't forget you have 25 new friends to meet along with 26 home made tutorials to learn. These projects make great gifts for friends, teachers, coworkers, family or yourself. ⌣


DIY Christmas Trees and Ornaments Wintry Silver Dollar Store Christmas Tree Decor | Remodelaholic Marbled Christmas Ornaments | Doodlecraft Scrap Wood Inlay Ornaments | The Ugly Duckling House Woodburned Wood Slice Ornaments | Sisters What Flocked Pine Cones | Practical and Pretty Abstract Monogram Ornaments | Domicile37 Concrete Christmas Ornaments | The Palette Muse Wood Slice Deer Ornaments | Our Crafty Mom Vintage Gumball Machine Ornaments | Beth Watson Design Studio Etched Glass Ornaments | Just Call Me Homegirl Unicorn Inspired Christmas Tree | The DIY Mommy Driftwood Reindeer Ornaments | Sustain My Craft Habit

41st Edition of TADA

Thursday, March 30, 2017


41st Edition TADA! Thursdays

Thrifty to Nifty Decor

Thursday, March 23, 2017


Thrifty to Nifty Decor

 Is a challenge we face everyday as we decorate our homes on a budget. This group of talented bloggers take thrifting to a new level. Dragonfly & Lily Pads has decided to join them to bring you a wealth of information to use in your home. Today I am sharing a wreath that I bought a few months back for Fifty cents. Learn how to make yours below along with Twenty Nine more thrifty decor items.

Thrift Store Decor Upcycle Challenge


The Rules:
  • Upcycle an item(s) from a thrift store, resale store, or garage sale into a new piece of decor.
  • There's no monthly theme.
  • There's no budget to stick to.

Meet the Hosts

Amanda | The Kolb Corner    Erlene | My Pinterventures    Kim | Made in a Day Dru | Polka Dot Poplars    Maureen | Red Cottage Chronicles    Pili | Sweet Things Shirley | Intelligent Domestications    Debra | Shoppe No. 5    Marie | DIY Adulation Chelsea | The Johnsons Plus Dog    Jes | My DIY Envy    Ann | Duct Tape and Denim Molly | Just a Little Creativity    Ashley | 3 Little Greenwoods    Kimm | Reinvented Kim | Farmhouse Made    Victoria | Dazzle While Frazzled    Sara | Twelve on Main Chelc | Inside the Fox Den    Sue | A Purdy Little House    Michelle | Our Crafty Mom Sherry | Savvy Apron    Jennifer and Vicki | 2 Bees in a Pod    Lora | Craftivity Designs Ali | Home Crafts By Ali    Denise | My Thrifty House    Colleen | Life on Kaydeross Creek Toni | Small Home Soul    Jeanie | Create & Babble    Jeannee | Shepherds and Chardonnay Michelle | Michelle James Designs    Medina | Grillo Designs    Karen | Dragonfly & Lily Pads

Make sure you follow our board on Pinterest for more upcycled decor inspiration!

Faux Etched Glass

Friday, February 24, 2017

I had the honor of subbing for the Silhouette School blog a while back. This is an update to the post I shared there. We have come a long way baby in materials for Faux Etched Glass. Since I wrote this post you can now find window cling readily available. I still is more cost effective to use the frosted vinyl you find at the fabric store but it depends on your needs.
 Here are my suggestions as to which material to use for each type of project you are making. 
  If you are using Window Cling Vinyl consider these attributes of the product.
1) Durable 2) Reusable 3) Higher Cost 4) Better for long term ex: Home Decor 
When using Frosted Vinyl yard goods there are different attributes to consider. 
1) Disposable 2) Delicate 3) Lower Cost 4) Great for Party Decor 
As you will find as you continue to read I decorated my door at the lake. The climate is always damp even on on a sunny day or draught. There is moisture everywhere. The original post that I have updated is more than two years ago. The dragonflies on the Back door are still there. The K is gone but the rest of the faux etched glass completed on the original post did not come off. I did wash the window and rearrange them since then. Watch my Keep on eye on my instagram during the next few weeks and I will snap a picture during my next visit.


Easter Egg Tradition

Friday, March 18, 2016


An Easter with two lovely ladies willing to share traditional egg dying was a great blessing. Below is a collage of the basic process. The best part of this lesson was they taught this technique to new generations. 
Most of the supplies you need are found in your backyard, sewing basket, sock drawer. and the grocery store.

Spring Ahead Lantern

Sunday, March 6, 2016

Hello, darlings get ready for a burst of spring. Are yo looking forward to "Spring Ahead" daylight savings time? For weeks, Hometalks DIY My Spring Home & Garden Blog Hop bloggers have been preparing the best of their spring home and garden projects to share with you.
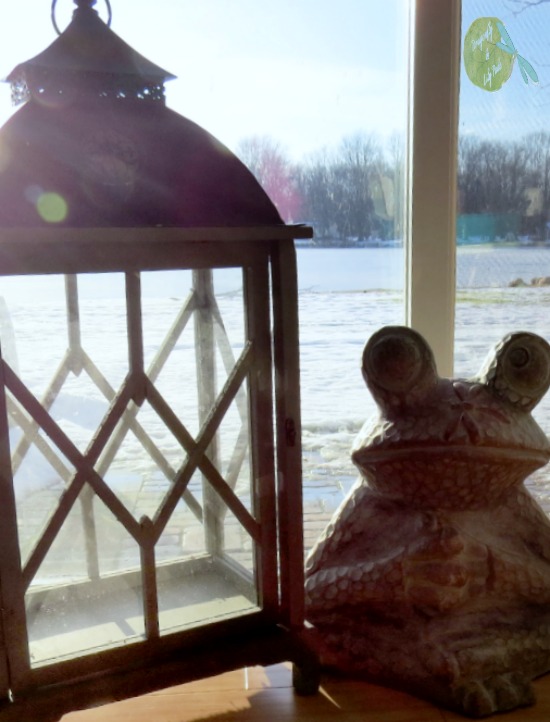
Green Lantern from Goodwill, Late Sun shadows from sliders at the lake house.
 I refreshed a lantern I purchased at a steal. There are long shadows when it is late in the day in any home but, at the lake, my zen frog reassures me I need to take the time to enjoy the view. The green was brushed with a combination of half & half white and antique white paint.

Serving Up A Mint Meltaway NightStand

Thursday, February 25, 2016

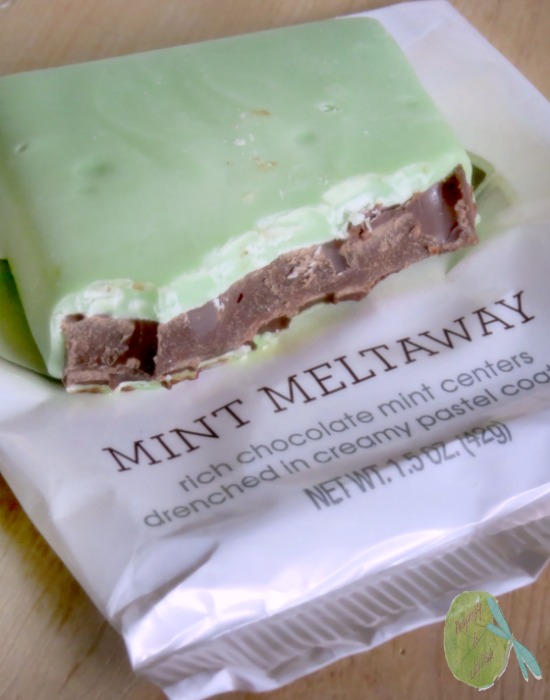
Today is themed furniture makeover day. Darlings the inspiration is chocolate and on the menu is a Fannie Mae mint meltaways. There will be craving over this months DIY Furniture Girls posts. These makeovers are so sweet they will make your teeth hurt.
These hard working women put their heart and muscle into the makeovers. Please visit their blogs at the links below and even better leave some comment love for each one of us. Now on with the show.
Off course, the best way to match the colors just right is to have a vision board? Tasting testing is a hard job but, someone has to do it. As you can see the inspiration was delicious.

Boys Dresser to Nautical Nod

Thursday, August 20, 2015

This month the Fab Furniture Flippin Contest is titled the "Icing on the Cake". I choose to add some shine to our boys childhood dresser. The people great people at D.LawLess Hardware sponsored this contest. They graciously provided the hardware for my boys dresser to help this piece of furniture grow up. Now this Nautical Nod is fitting for my sons room at the lake house. 
As you can see here this dresser is tired. We bought this when our first son was born 29 years ago. Did I just say that out loud? Well! I was very Young. 
Thank you to our hosts this month
Along with the creative team

The Sponsor this month D. Lawless Hardware from Olney, IL
This post is sponsored, but all the opinions are my own.
 Artesia Knob - Sedona Bronze 45mm L-P17020C-SBZ-CArtesia Knob-Sedona Bronze
                            L-P17020C-SBZ-C
Thank you for the lovely knobs chosen my son A. for the dresser from
 D. Lawless Hardware. I am very proud to have a great supportive company with superior products in the same state that I live. Illinois is certainly having a tough go of it right now. I appreciate the company for sticking with us during the hard times. 

DIY Pillow Painting Design

Saturday, August 15, 2015

    I am sharing the DIY project I will be demonstrating at the Randolph Street Market First Midwest DIY Blogger Roundup. DIY does not have to be with power tools. I do love my power tools and building. Huge Smile! I chose to show you how you can add the feeling home to any space without a huge expense all by yourself. 
We are focusing on things to make for Back To School. Now remember back to school affects everyone. The small ones starting school, middle school taking on more responsibility and high school graduates leaving for college. Each one of these events also affects parents, grandparents, and even a homes function.
I am going to use a pillow form, metallic fabric paint, and stencils. You will also need a piece of cardboard to place in between the pillow form to keep the paint from bleeding through to the other side.

Midwest DIY Blogger Round-Up Reservations

Friday, August 7, 2015

     I asked if we could blend the Randolph Street Market with DIY bloggers to create a place for bloggers to meet in the Midwest. This area of the country is an untapped resource for bloggers to network, learn and let their talents shine. Planning this event was no small task but, well worth the effort to provide a platform for the Midwest bloggers, companies, and of course, one of the top ten markets in the country.
   The Randolph Street Market Make Your Reservation Here along with a special rate at the Chicago Athletic Association Hotel which has received numerous features in magazine, fabulous reviews and is absolutely a stunning restored piece of Chicago's skyline.
Thank you to the Randolph Street Market, Chicago Athletic Association Hotel, Hometalk and Blitsy for your generous sponsorships supporting the First Midwest DIY Blogger Roundup. Without their support to create this venue for us to network this event would not be possible. Please remember to show them your appreciation

How to Stencil an IceTub for Beverages

Monday, June 8, 2015

    I am so excited for my high school girlfriend and her family. They have made a "Big purchase" recently. They bought a house in the woods on a lake in Wisconsin. Growing up my girlfriend her family vacationed at the lake nearby their new home. She met her delightful hubby there while hanging out with the kids at the lake for Summer break. Their love story reminds me of the movie Dirty Dancing in a dreamy sort of way. <3
 I was digging deep for a great gift idea for celebrating the special time in her families life.This present needs to be as incredible as my friends who I consider chosen family. I purchased an acrylic ice tub in a rectangular shape from Home Goods. I have an added surprise for her hubby, but that will have to wait.
 My plan to create a template of their last name in LB Timely font to personalize the ice tub and the tray.

Rust Ravaged to Beauty Salvaged Lamp

Friday, January 9, 2015

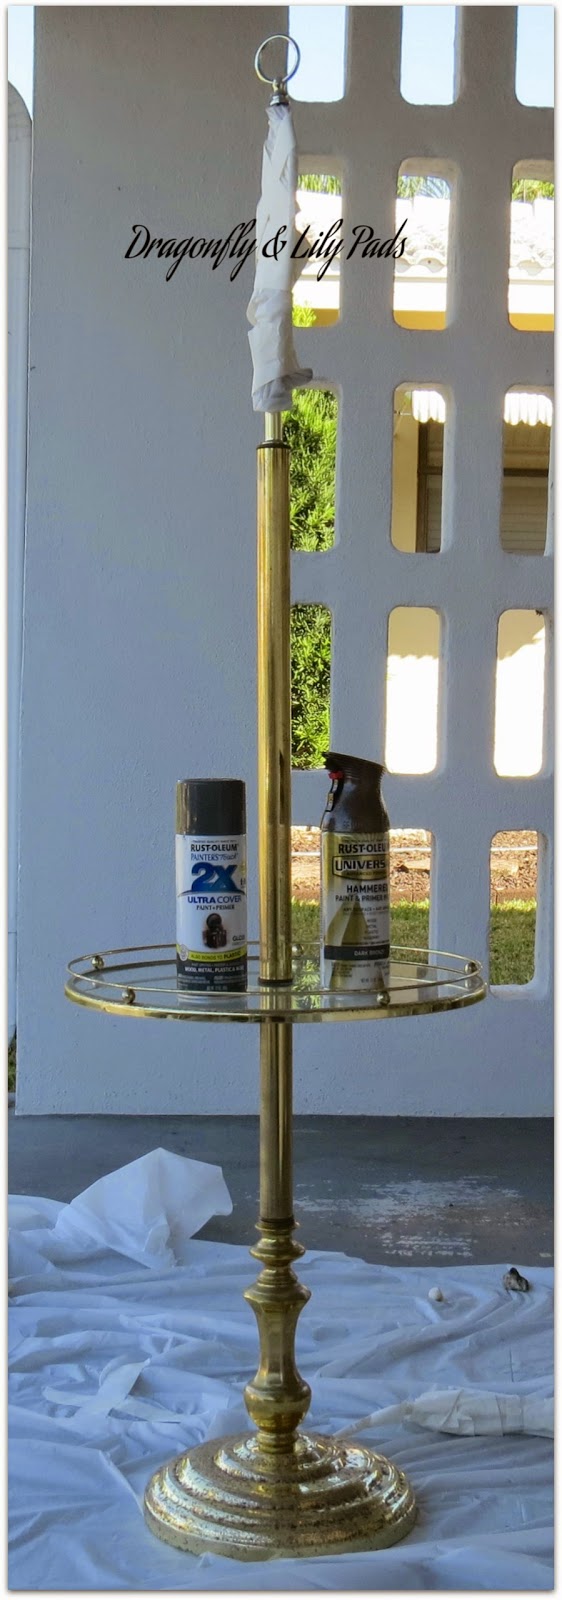
     This poor lamp was ravaged by the salt air of sea side living in Florida. Now I realize these are not glamour shots but, I was working under difficult conditions. This sweet Lamp was used to stage a home I was tasked with getting ready For Sale in less than two weeks. The lamp was in the home as you see it in the before getting ready to paint. I bought two types of paint the gray that I decided to use the Bronze hammered.  I did not use it in this project.
Brass Floor Lamp, rusted, Paint Cans, Table Cloth, Dollar Store, BeforeBrass Lamp, Rusted, After, Spray Paint Gray, Rust-Oleum 2 X Coverage, Painted 1 Coat
1 Can of Rust-Oleum 2 X Coverage Gray Spray Paint, Brass LampSupply List, Rust-Oleum Gray Spray Paint, Dollar Store Table Cloth, Sandpaper, Painters Tape
It was a gorgeous sunny day so I had to keep the lamp in the shade of the carport so it would not dry

My Five Favorite Posts of 2014

Friday, January 2, 2015

     My favorite posts from 2014 are probably different then yours but that is because they are my projects and I know the why,what, when and how of each one. I am learning how to express myself to share those portions of the story with out becoming *boring! Of course I want to write a great tutorial, take awesome pictures, and keep you interested in coming back. Telling all the back stories might become a Blah, ba, ba type of post. +Michele Alger owner of Shelstringblog asked a group of us to round up our favorite post of the year.

 At first I though this is a piece of cake but, then it was like choosing a favorite child. They all are special to me, although it was hard to choose here are my 5 favorite posts no particular order.

The Best of 2014 a Year Review!

Wednesday, December 31, 2014

  This is my first year in review since I started blogging. I am excited to bring you the top ten posts of the year. Together we have accomplished more then I ever dreamed of when I started Dragonfly & Lily Pads in October 2013. I want to thank each of you for support.  As this year ends I have a sense of relief, excitement, and a positive outlook for the coming year.
Why relief you ask? Because we all have times that our life takes us in a totally different direction. I believe in helping when there a need from some one you love. Family has taken on a whole new meaning to us this year.
Excitement now your wondering? Making that day in Oct. 2013 count as Something New each day by writing DNLP blog. This blog is a bit of a gift to myself, as I express my creativity, share my love by inspiring others, and transforming all of us into the people and lifestyles we strive for in everyday life.
   OK! A little deep I  know but, it is truly how I feel.
Positive outlook is pretty easy because, this year has been a difficult year outside of these pages. 2015 is going to be different. I have learned a few valuable lessons about who I am and where I want to be this coming year. I will be sharing more about these goals during the coming year.
Today is about the closing the past year 2014 and opening a new door to 2015. Choosing what I want to carry with me as hard taught lessons, and what to Let Go! Yeah I went there...LOL
  Today I am sharing the top ten posts of the year chosen by you .
Sweet Baby Love Quilt, Yellow, White, Gray, Giraffe, Elephant, Silhouette Cameo

Home Depot Do-It-Herself Workshop 2

Tuesday, December 23, 2014

As promised I am back from my cookie break and ready for a fantastic time at the Do-It-Herself Work Shop at +The Home Depot. I am having a great time learning and meeting new people during the work shop and even made plans to meet up with a new friend for the next one already.
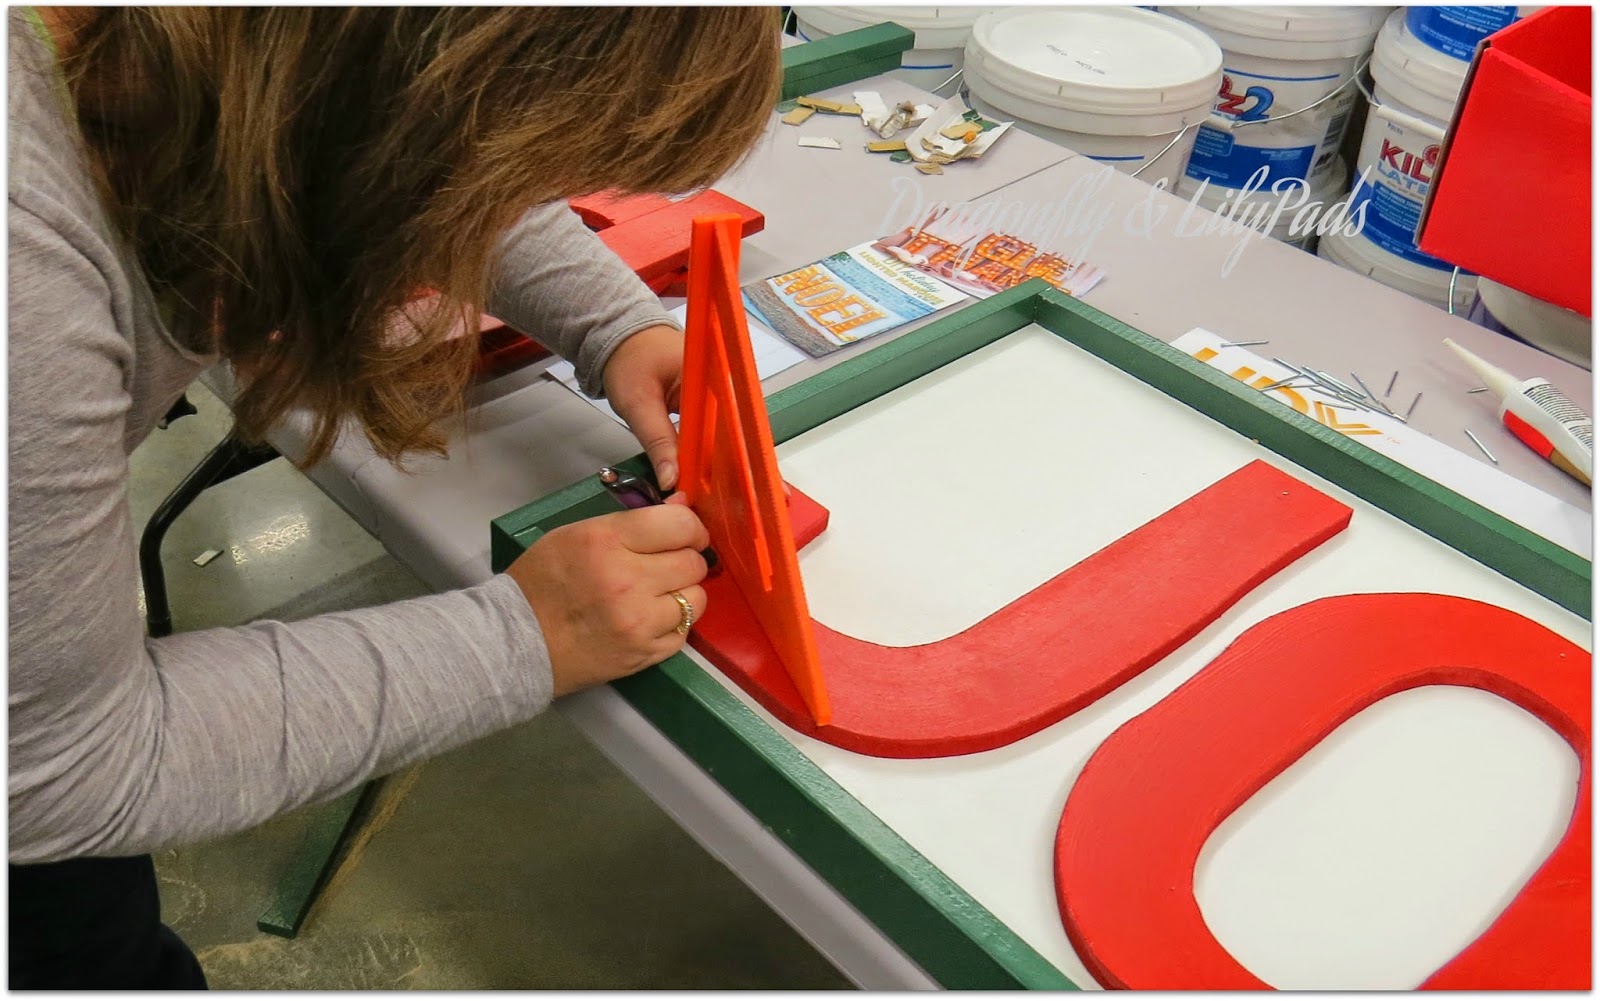
Speed Square, Marking Holes, Her It Yourself Workshop at Home Depot

Home Depot Do-It-Herself Workshop 1

   I am so excited to share my Do-It-Herself Workshop experience with +The Home Depot. We did so much work that this will take two posts to complete Joy Lighted Marquee Sign steps. Now don't worry it is not hard but, takes several steps and I want you to be able to build your own.
Letters, Joy, Home Depot Do It Herself Workshop, Directions, Wood Glue
Here are some of the supplies you will need to complete the sign. I will add a link to the Home Depot Holiday Project directions at the end of the post 2.

Elf Gift Exchange Bonds Bloggers

Wednesday, December 10, 2014

Today you have hit the mother load of blog posts I Have joined in with Bloglovin to expand my blog Follow me on BlogLovin , included is a tutorial, a gift exchange and a round up coordinated by my sweet friend +Michele Alger
  Now on to the elf gift exchange which, gave bloggers an chance to learn more about each other, and share holiday spirit. I was lucky to become +Ali Williams  Elf. Thank you Ali for coordinating a bunch of creative bloggers to assemble gifts before Christmas. No easy task I can assure you. We Creative creatures tend to drift here or there especially at this time of year.
  Ali Williams is the creator of Skinny gf  Chef please visit her to grab a few healthy recipes.
  I chose to make her a card as well as a gift card. Shhhh she hasn't received it yet.
I started with doing a bit of stalking on her blog, FB, IG to find out what she liked. Creepy I know but it was for a good cause.
Merry Brite Photo Ornament, D&LP Designs, Elf Gift Exchange bonds Bloggers