Nautical Personalized Cooler

Monday, September 14, 2015

   Today I am showing a step by step directions to personalize a cooler.  I am participating in the September Silhouette Challenge which is Outdoors and a bonus of Green. Let's see How I cover those tasks with my project. We have all been to a soccer game with the other parents trying to figure out which pile belongs to our family. This will help keep you more organized on the treat days, sporting events, or even label the bag groceries to bring home your frozen foods. I use the cooler bag for the grocery store and a day on the boat at the lake. 
D&LP Chevron, Cooler Bag, Source JoAnn Fabrics & Crafts, Teal, White, Green
 I bought this bag last summer on clearance from JoAnn's Crafts Store. I love the color for my lake house. While I was working on this project my oldest son (A) commented on the colors of the cooler. He said teal and green are the themes of the lake house. I said those are the colors because they remind me of the beach. He said he liked it. Which is quite a compliment coming from an Architect and Mechanical Engineer with an eye for design!

How to Stencil an IceTub for Beverages

Monday, June 8, 2015

    I am so excited for my high school girlfriend and her family. They have made a "Big purchase" recently. They bought a house in the woods on a lake in Wisconsin. Growing up my girlfriend her family vacationed at the lake nearby their new home. She met her delightful hubby there while hanging out with the kids at the lake for Summer break. Their love story reminds me of the movie Dirty Dancing in a dreamy sort of way. <3
 I was digging deep for a great gift idea for celebrating the special time in her families life.This present needs to be as incredible as my friends who I consider chosen family. I purchased an acrylic ice tub in a rectangular shape from Home Goods. I have an added surprise for her hubby, but that will have to wait.
 My plan to create a template of their last name in LB Timely font to personalize the ice tub and the tray.

Print & Cut Valentine's Day Banner

Monday, February 9, 2015

Welcome to the second Silhouette Challenge Facebook Group of 2015. Print & Cut with a choice to raise the bar and use hearts. Easy peasey right!
 The plan was to get this accomplished on Monday. I finished it Wednesday night with a few bumps in the road due to equipment failure. Yes failures happen to bloggers all the time. We are human and have the same frustrations as other people when their machines do not work.
brPrint & Cut Valentine's Day Banner Print from my Silhouette Cameo library
 Here is what I chose to print from the items I have already purchased at the Silhouette store. This was my first step.
In this picture I am showing you how to not cut the flowers because that is my pattern. Not my cut selection because I will be cutting out letters.

2015 Blog Planner Designed for Dragonfly & Lily Pads

Monday, January 12, 2015

    We are all planning to get organized for 2015. This is my first year using a traditional planner. I can see the challenges are stacked against me as my plans seem to be ever changing. Are your days like mine? Starting out with strong goals to accomplish, ending with where did the day go, and adding at least a few of the tasks to the next day.
  The Silhouette Challenge for January is organization. Last year I did Create Craft Room Labels which was part of my The Best of 2014 a Year Review. This is the first time since I participated in the challenge I have made something for my blog. I think after a year of giving me a great sense of accomplishment this project of mine deserves some attention. Since I bought the planner I decided to give it a little shot of Dragonfly & Lily Pads decor. My strategy: if  I am going to work with the planner everyday it mine as well look pretty. 
I bought this planner from the +Dollar Store selected my vinyl colors from my stash of a variety of companies. You can see the colors behind the planner and in the +Silhouette America Cameo.

The Best of 2014 a Year Review!

Wednesday, December 31, 2014

  This is my first year in review since I started blogging. I am excited to bring you the top ten posts of the year. Together we have accomplished more then I ever dreamed of when I started Dragonfly & Lily Pads in October 2013. I want to thank each of you for support.  As this year ends I have a sense of relief, excitement, and a positive outlook for the coming year.
Why relief you ask? Because we all have times that our life takes us in a totally different direction. I believe in helping when there a need from some one you love. Family has taken on a whole new meaning to us this year.
Excitement now your wondering? Making that day in Oct. 2013 count as Something New each day by writing DNLP blog. This blog is a bit of a gift to myself, as I express my creativity, share my love by inspiring others, and transforming all of us into the people and lifestyles we strive for in everyday life.
   OK! A little deep I  know but, it is truly how I feel.
Positive outlook is pretty easy because, this year has been a difficult year outside of these pages. 2015 is going to be different. I have learned a few valuable lessons about who I am and where I want to be this coming year. I will be sharing more about these goals during the coming year.
Today is about the closing the past year 2014 and opening a new door to 2015. Choosing what I want to carry with me as hard taught lessons, and what to Let Go! Yeah I went there...LOL
  Today I am sharing the top ten posts of the year chosen by you .
Sweet Baby Love Quilt, Yellow, White, Gray, Giraffe, Elephant, Silhouette Cameo

Blogger Silhouette Tutorial Ornament

Monday, December 15, 2014

    The Blogger Christmas Series was created to bring you a wealth of ideas to celebrate the season with many bloggers. She has rounded up several different blogs from around the country for the last few weeks. Thank you +Christine Graves for coordinating, as well as orchestrating these beautiful packages wrapped up for all of us to share with our readers

Personalized Christmas Ornament

Monday, December 8, 2014

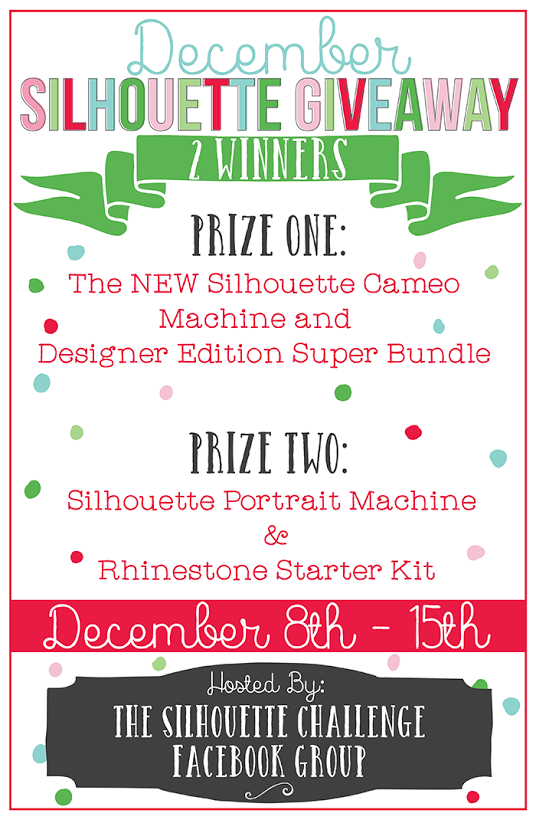
     One of my favorite times of year is Christmas.  In the Gift giving spirit The Silhouette Challenge Facebook Group December Challenge is here along with a Holiday Giveaway. We have 35 Group members and +Silhouette America  helping us gather this Giveaway for this special time of year.
Silhouette Giveaway, 2 Winners, December 8th - 15th Hosted by The Silhouette Facebook Challenge Group

A DIY Stenciled Inspiration Board

Monday, November 10, 2014

    We look for inspiration everyday, in many places. I have read about achieving your goals, by placing them on a board, and looking at it daily. A place to organize your thoughts, where, what & how will you get to your next goal. The far off future goals too. Now you can see where the idea for the DIY stenciled inspiration board came for this post. In my Fall Mod Podge Pumpkin post I mentioned buying two carts of goodies at +Michaels Stores. I bought several framed cork boards that were on a great clearance sale.
To be honest I struggled with what would be the best approach to make this board inspiring. Then in a series of unrelated life circumstances, I was in Pompano Beach, FL. looking for document boxes with Prince Charming.The Office Depot was having a clearance sale because, they were moving. I found what I needed at the store 30% off and Gelio Gel pens for 50% off. Hmm. This would work on the cork board but, now what should I stencil?
DIY Inspiration Board, Silhouette Flourish, #44437 Design,
I chose the inspirational phrase by Kolette Hall and +Silhouette America Flourish design.

First Year Anniversary of Blogging {Blogiversary}

Friday, October 24, 2014

    I am celebrating the First Year Anniversary of Blogging! I prefer to call it my  Blogiversary. I have good news for you too.
 What is a celebration without a party? Boring! Several friends and I are holding a Spook-Tacular Silhouette Giveaway. The value is over $275.00 of  products to inspire you to be creative and transform your house into a  home.
 Be sure to enter before the deadline on Monday October 27th, 2014. I'd love to  cap off this year with one of you winning this great prize.

Fall Lovin October Silhouette Challenge

Monday, October 13, 2014

     This month the theme for the October Silhouette Challenge is Fall! I chose
 5 different shades of +Bazzill Basics Paper card stock: on sale for 59 cents at  +Michaels Stores
 One group of leaf shapes from the +Silhouette America Store:  99 cents.
 One wreath Stand from +Decor Steals:  (previous purchase)
 The leaves I wanted to cut out from my Silhouette library
Silhouette screen, Leaves, Cut set up, Red, Blue, Dragonfly & Lily Pads

Sweet Baby Love Quilt Big Reveal

Monday, September 8, 2014

     When I submitted the Sweet Baby Love Quilt post to the Silhouette Challenge back in February it was a huge hit. The post was featured on Nap Time Creations Weekend Feature. Thank you for such a lovely acknowledgement. This was my first Feature as I had only started blogging in October. This month when Decor was named as the silhouette challenge, I knew it was time for the Quilt Big
Reveal.
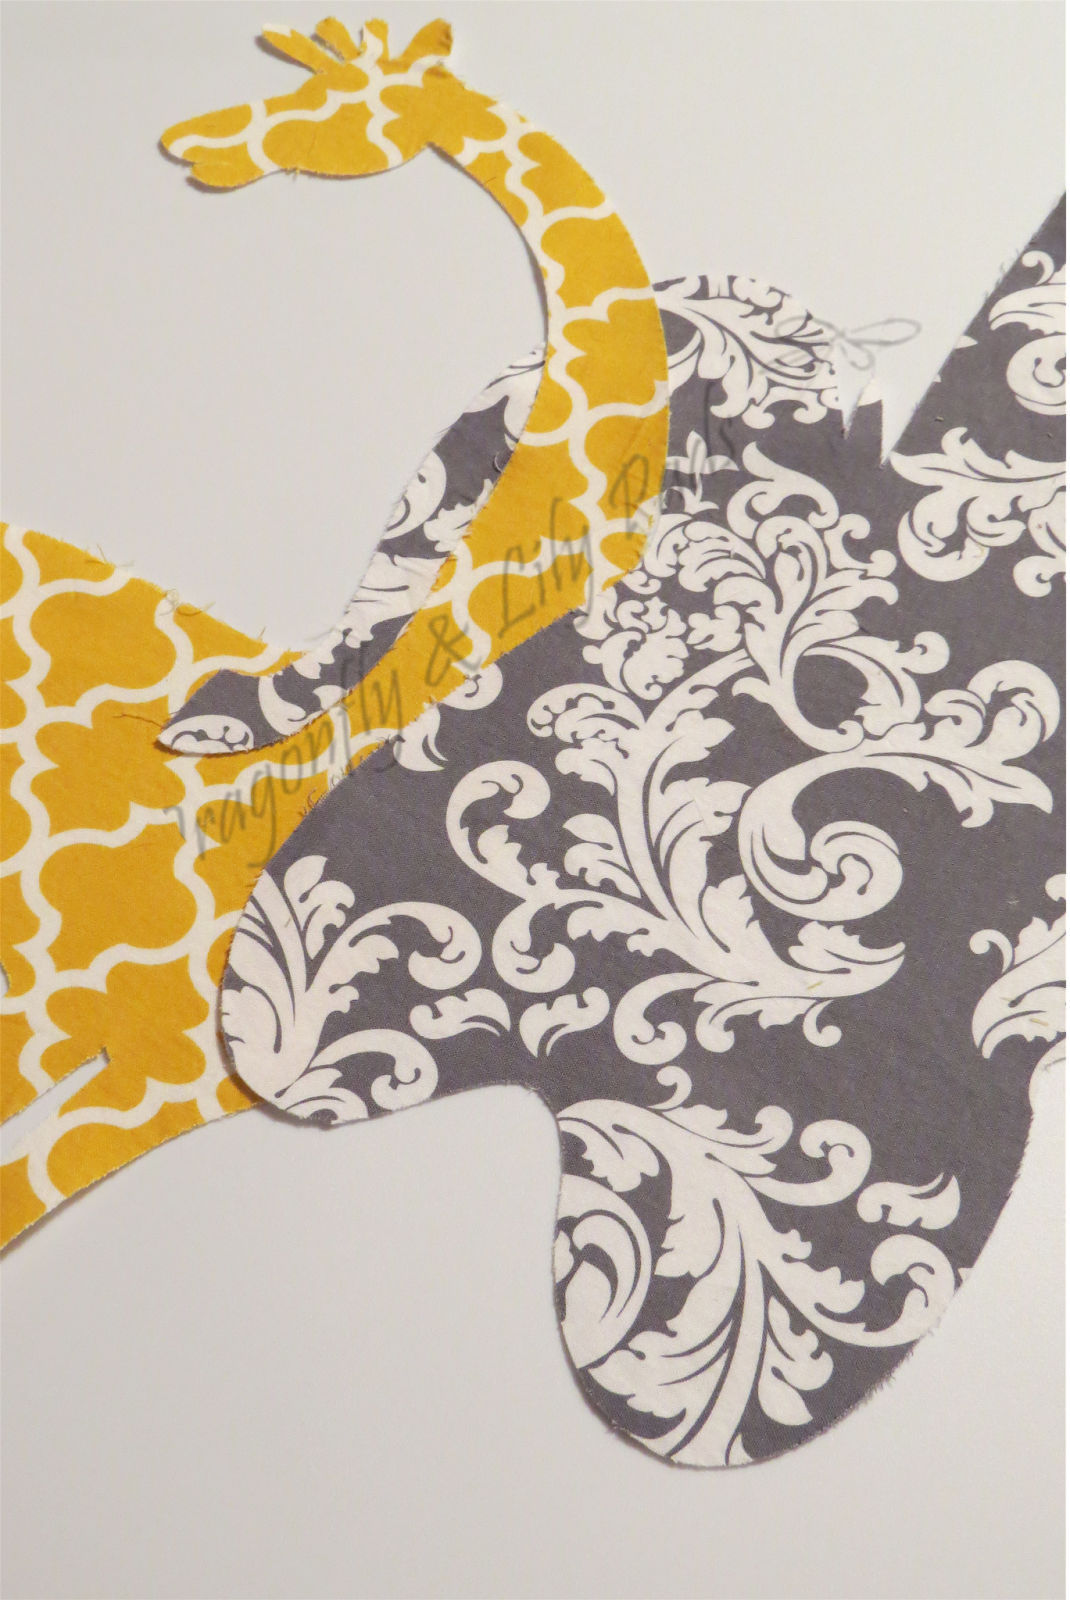
Animals, Giraffe, Elephant, hug, Gray,  White,Yellow
Do you recall seeing this picture on the Sweet Baby Love Quilt post? To re-cap the first step in making this project click on the the title above. I used the +Silhouette America Cameo to cut out the shapes. I carefully blanket stitched around each animal shape with a small stitch length to finish the edges.

Personalized Classroom Sign for the Teacher

Monday, August 11, 2014

     Today is a day of firsts for Dragonfly & Lily Pads. I can not thank you enough for taking your time to read what I have to share. While readers have been increasing, I am gaining confidence. This is the first blog post, I am writing as the owner of my domain name.                          www.dragonflyandlilypads,com\
  This week is the August Silhouette Challenge. I decided to make a personalized sign for a special teacher.  My brother teaches First Grade in a local school. Teaching children is something I have in common with my brother. Did you know that I have an Early Childhood Degree? 
  The theme for this month is" School". After I pondered this project, I settled on giving my brother label stickers. I called him to find out the size, and shape that would fit his needs. By the time we finished brainstorming together, we decided a classroom sign would be even better. He added, before he hung up that the school colors are blue & white, and the mascot is a dolphin. 
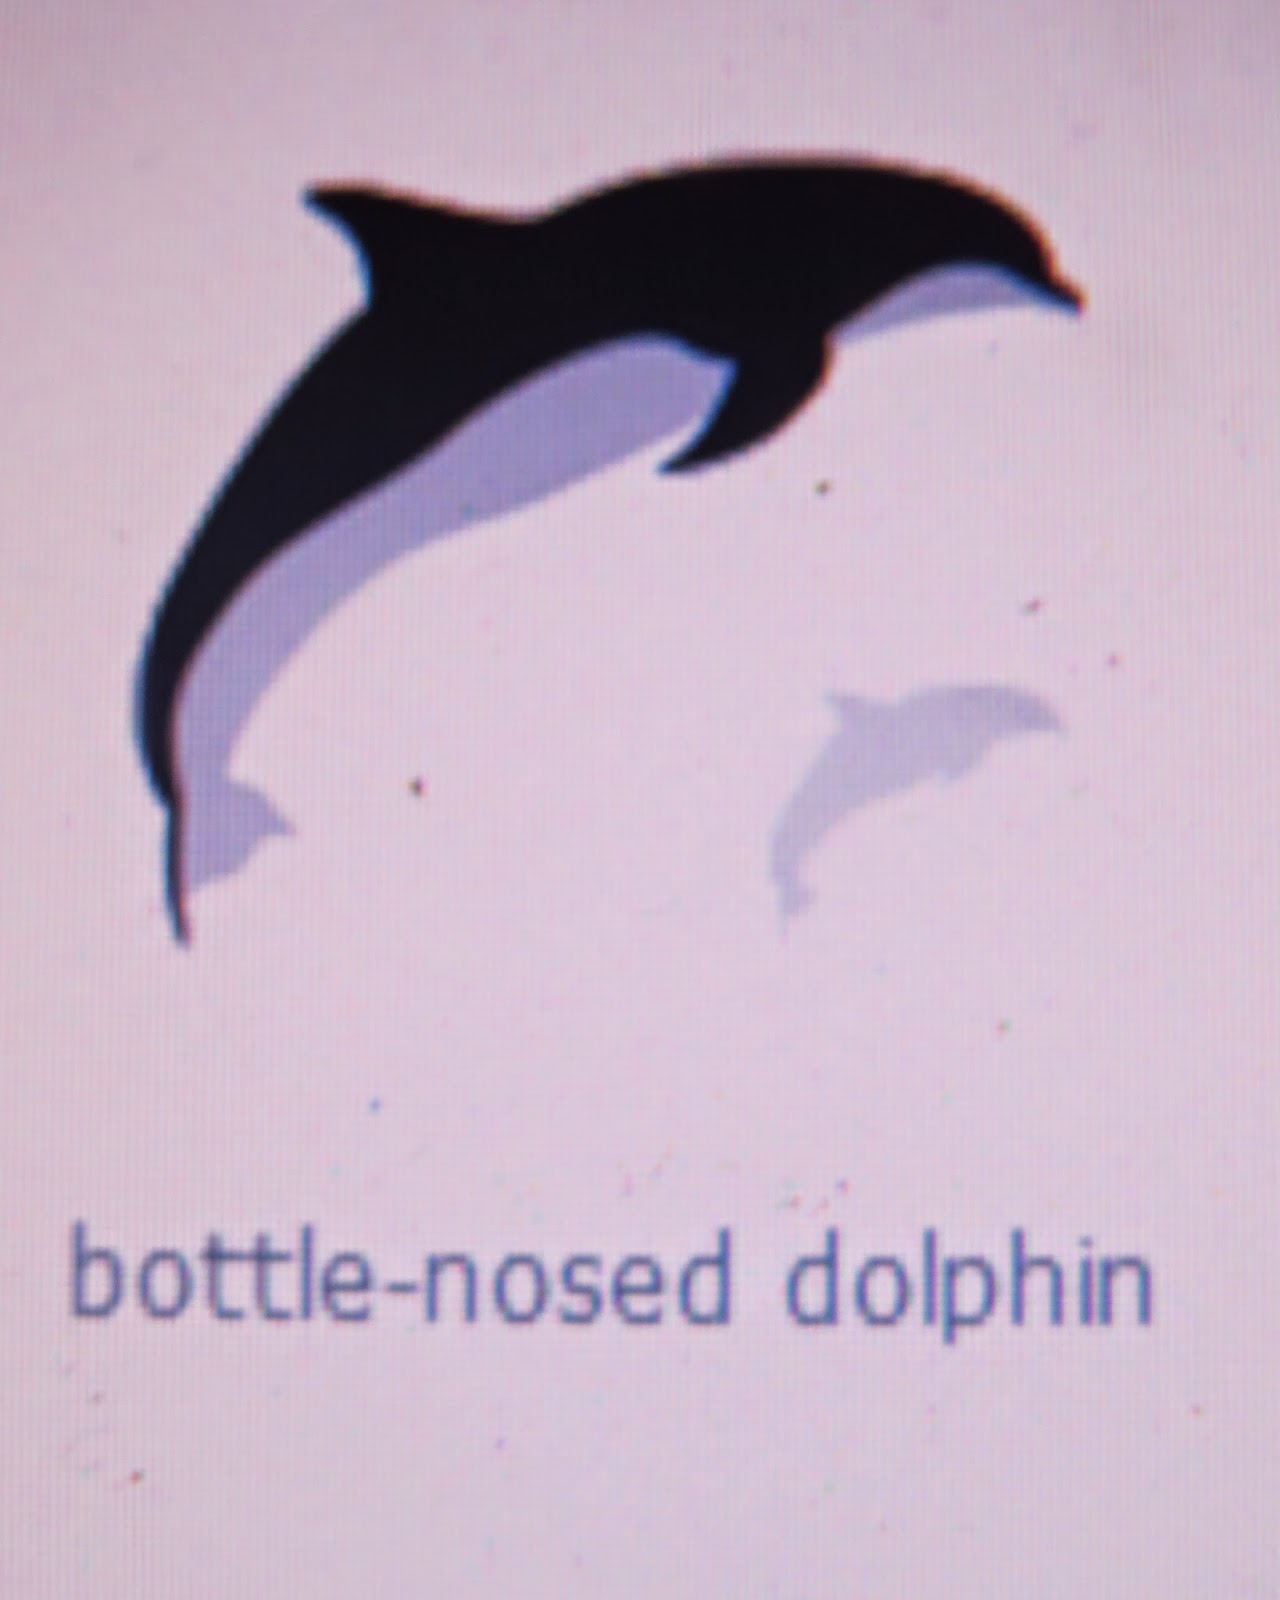
  I purchased this dolphin shape from +Silhouette America 
for 99 cents
Dolphin, Silhouette Cameo, silhouette design, August Silhouette Challenge

Summer Patio Deal

Thursday, July 24, 2014

    Whether it is in Michigan or Illinois, you bet I will be out looking for Summer patio deals. After all for us this is furniture that is only getting used part of the year. Now having two homes there are plenty of opportunities to add a bit of seating, tables for beverages, and cushions with pretty fabric too.
   Today, I definitely added to the patio pizazz, with a stop at +Pier 1 Imports, while my Prince Charming stopped at +Lowe's Home Improvement. He is doing a cool storage project in the garage. I  will write about his dazzling project when he completes it. I will also have an upcoming post on my +Pier 1 Imports shopping trip soon.
   Today I want to share a quick project with you that required no tools, is a great budget saver, and looks like an expensive piece of furniture.
   I was shopping at +Jo-Ann Fabric and Craft Stores in Countryside, IL. Before the 4th of July during their Summer Clearance. Yes of course a 20% of all my purchase coupon was at the ready in my cellphone. I came across a plastic wicker planter for $19.99 reduce from $69.99. I was fast at grabbing that black brown weave, because a simple idea was brewing. As I walked up and down the aisles, trying to remember my list of "needed" items, I came to a tin serving tray with rope handles for $9.99. The plan was hatched, that tin tray practically leapt into my cart. All it needed was a ride to the lake for completion.  
  When you read my read my post "Favorite" Silhouette Challenge, you already saw the table. If you missed it click on the title to read about the topiary project I made.
   This is what the basket looked like when, 
I bought my steal of a deal
 Pier 1 Imports Wicker Swivel Chair, Wicker Planter from JoAnns, Patio

"Favorite" Silhouette Challenge

Monday, July 14, 2014

   
  This "Favorite"Silhouette Challenge is one I have been waiting to share with you. I had this project waiting in the wings.  A family emergency kept me from completing my design for an earlier challenge this year.
Supplies, Scrapbook paper, Cordless Glue Gun, Wire Cutters, Sisal,  Twigs, Styrofoam, Floral Wire, Burlap
   List of Supplies, 

Patriotic Made in America Banner

Monday, June 9, 2014

     I am excited to be part of the Silhouette Challenge this month. This challenge theme is patriotic for each project. I am made in America, my family serves our country now, and  many generations before. I like this challenge because the Cameo is made by +Silhouette America too. 
   I used several Silhouette cut patterns, some with slight changes to make it my own,  for the American Banner
Red, Bunting, Folds, Silhouette

Monogrammed Gifts

Monday, March 10, 2014


   I started making Monograms for gifts. I create them with my +Silhouette Cameo, scrapbook paper, glue, and my +Xyron Inc sticker machine. I Made them as gifts, which needed personal touches for each precious person. These were all given to my nieces, and nephews. Auntie Karen Marie had to add a special color, paper design, or some even have a nod to their nicknames.
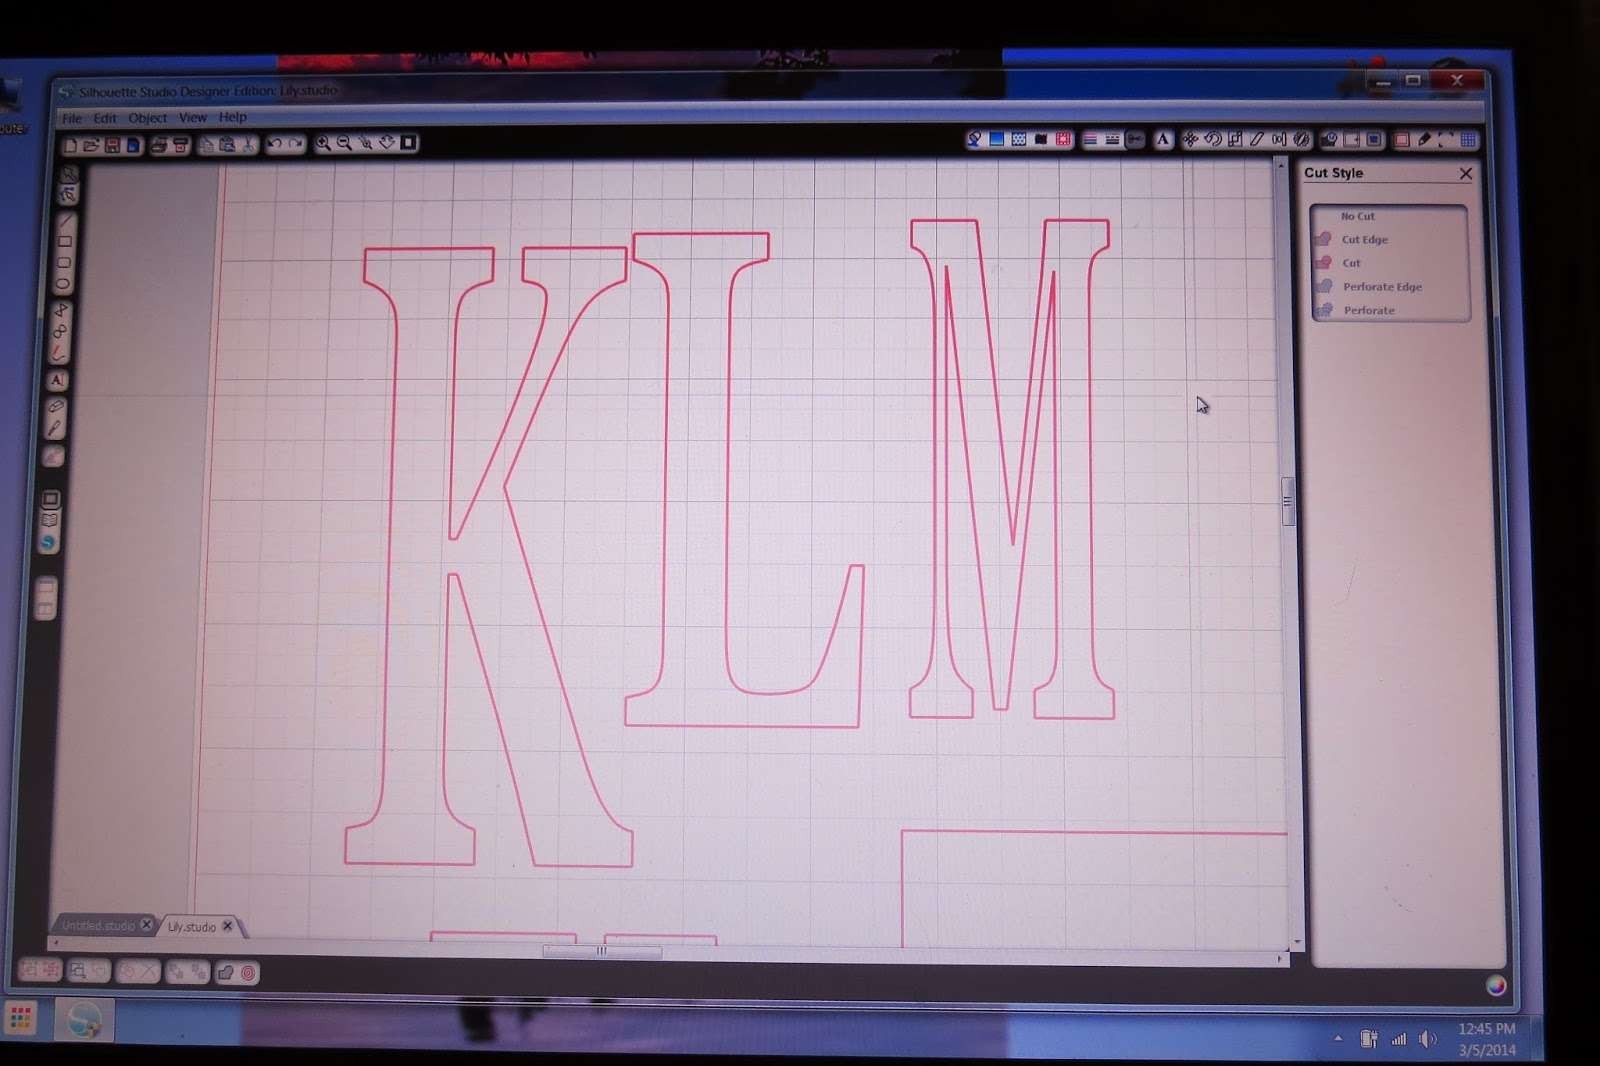
All you need from the Silhouette portion of this project is right on this screen!
   Did you know that you can print paper from your Silhouette? I was searching for paper with bears and stopped by Archiver's Scrap booking Store. (Sad this Company is now Closed) I asked a clerk, she was a delightful person, who showed me how you simply type bear paper in the Silhouette Cameo search box and hit enter. A few second later there was a paper that was perfect for my bear project. When I arrived home I added it to my cart, and a few seconds later, I printed it out on my printer at home on card stock.
I think it came out very successful.
I wanted to show you here that I used a 6" x 6" frame on the top. When I was completing my gifts I ran out of those frames. Being a Creative Person, I adapted to what I had on hand, 9" x 9" frames for the remaining 3 frames. It does let me show you how you can get a different look by adding an additional background paper and foam tabs to lift the design off the page.
 Of course my plan all along? LOL

How many of you have a Big Family? Now I mean BIG!
   I love giving gifts to all my nieces and nephews but, when you have been blessed with enough to field more then two baseball or softball teams. Next mix in 3 great nieces, 6 great nephews, and an additional delivery is waiting to surprise us any day now?
Wow! I just realized we can field another team + One, I hope by now!


    Each color and style of Font has been chosen for the room colors, personality, and gender. As you look at this picture above, you will notice the Letter mans Font from the +Silhouette Stores in the middle.


1. Here you see how I set up my page. I add the 6" x 6" Square first because it gives me the area I will need to work.
2. Then I select the Monogram Letters. The Center is the last Initial which I make larger then the first and middle. In this instance K is the last  name initial, L is the first name, and M is the middle one.

 3. The final step to set up my monogram project is to make another layer to add depth. To do this I Copy my letters and paste to page  then line them up as shown. Move the individual letters and square off the page for a minute. Next I highlight and drag over the whole image in the bottom left of the screen and hit weld. Then you can drag it all back to be on one page again to save. Click save I used  the persons name, it was easiest for me, then I could use this template for each layer.

 Now to create the layers you will need a Background, Welded and Three separate initials.
This is where I choose to through in each personality of the recipient of the gift.
   Above is is an example of how I did this with the paper. First the background is paper with bug stickers for the nickname bug. Just lady bugs and fluttery bees did not fit this boy's personality but I needed bugs. The stickers worked out great and know my nephew has custom paper for his gift. I do wish I would have copied, and saved the paper with the bugs, as a image for future use though. Next time! In order to cut the layer I just moved the other items to the side and cut only the 6 x 6 inch section.
 Next I moved over the welded layer into the page and slid out the background.
   Layer number two is the welded layer, which I usually chose a subtle pattern. 
This one is grass because that is where bugs live! Pretty corny I know. Ha Ha! 
Then I move the welded section off to the side.
The final Layer is the individual letters. I like to make them all different paper patterns that compliment each other. I put one letter on at a time, because I am usually using small pieces of paper by now. I do not want the paper to get caught in the up machine.
 I know, I could attach them all lined perfectly but, this is just my preference, after a few mishaps.
 I glue the first and middle initials on then place the last initial on top to give it more importance.

 TaDa! Three of the many Monograms I have made.


 I have realized that I could have used no cut option on this project. I have learned that process since I made these for gifts. That is one of the great parts of life, we always have opportunities to keep learning. If you are wondering where frames came from it is one of my favorite stores +Michaels Stores. I hit half prices sales and stock up.

Until Next time........
~Let Your Creative Spirit Dance~


Please follow along with my Silhouette Challenge Friends have shared their posts today too!


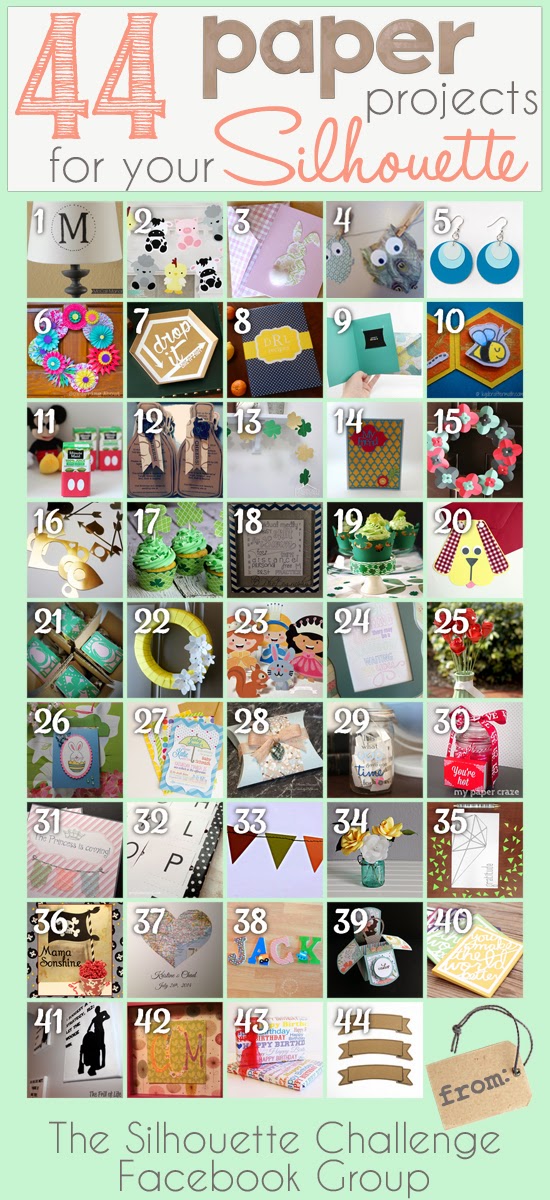
The Great Lamp Rescue Barnyard Animal Paper Garland & Party Details Sweet and Simple Easter Bunny Card Owl Theme Baby Shower Ombre Paint Chip Earrings & Free Cut File Spring is Blooming Drop It (Like It's Hot) Hexagon Tray Spruce Up Your RECIPE BOOK Gift Card Giving Free Cut Files Custom outlines for stamps Mickey Mouse Clubhouse Juice Boxes Wine Themed Bridal Shower Learn How To Make A Sewn Paper Garland! Moroccan Thank You Card 3D Flower Spring Wreath For the Love of Paper: Cutting Embellishments Create Your Own St. Patrick's Day Cupcake Wrappers and Toppers Swimming Word Art St. Patrick's Day Lime White Chocolate Chips Cupcakes + Freebie You're invited to a dog party! I'm so Lucky! Spring Wreath with SIlhouette Cut Flowers Tiny Princesses Paper Dolls Colorful Quote with your Silhouette Get Well Bouquet with Persimmon Roses Greeting Card Holder Baby Shower Invitations How-To Create a Custom Pillowbox on Your Silhouette Machine + Free Cut File! Quality Time Jar Matchbox Cover with {FREE CUT FILE} DIY Baby Girl Shower Invitation Candy Alphabet Travel Game Paper Garland Pretty Paper Roses DIY Geometric Heart Journal Hand Made Decorations for a Pirate Party Wedding Shower Gift Heart Map Decoupaged Letters (A scanner + A Silhouette = Spectacular results!) Easter Pop-up Box Card with Sweet Sorbet Designer Paper from Stampin' Up! Better World Greeting Cards Star Wars Silhouette Canvas Monogrammed Gifts Make Printable Gift Wrap with your Silhouette Software Free Printable: Blank Banner with free Silhouette Cut File
1. McCall Manor // 2. The Turquoise Home // 3. Creative Savings // 4. Sandpaper and Glue // 5. The Thinking Closet // 6. Sowdering About in Seattle // 7. Persia Lou // 8. From Wine to Whine // 9. Dream a Little Bigger // 10. Please Excuse My Craftermath... // 11. Play. Party. Pin. // 12. Everyday Paper // 13. Practically Functional // 14. A Tossed Salad Life // 15. My Favorite Finds // 16. The House on Hillbrook // 17. Adventures in All Things Food // 18. A Glimpse Into Barb's Life // 19. TitiCrafty // 20. The Experimental Home // 21. feto soap blog // 22. Creative Ramblings // 23. The Stamp Doc // 24. Ginger Snap Crafts // 25. Simply Kelly Designs // 26. Whats Next Ma // 27. unOriginal Mom // 28. Bringing Creativity 2 Life // 29. Cutesy Crafts // 30. My Paper Craze // 31. Create & Babble // 32. Grey Luster Girl // 33. The Sensory Emporium // 34. Lil' Mrs. Tori // 35. Black and White Obsession // 36. Mama Sonshine // 37. Weekend Craft // 38. Creative Carnival // 39. Peace, Love and Joyce // 40. Tried & True // 41. The Frill of Life // 42. Dragonfly & Lily Pads // 43. Get Silvered // 44. Minted Strawberry

Sweet Baby Love Quilt

Monday, February 10, 2014

   It is time for another +Silhouette Challenge Fabric: I am going to learn right along with you as I cut fabric on my +Silhouette Cameo. I am making a baby quilt for my soon to be great niece or nephew. This decorator fabric was used at two of the baby showers for this new little one. I am the babies father's Godmother.
   The design of the nursery is gender neutral, since the parents are waiting for the birth to find out Pink or Blue? We are all excited while feeling Blessed. The room is Pottery Barn Baby inspired with the colors yellow, white, gray, along with Elephants and Giraffes.
Which pattern or color do you think I used?
Next I got to work on my silhouette starting to look for a good image.
 Found this but it needed some work to fit my plan?

Sweetheart Garland or Streamers

Thursday, January 30, 2014

     Hearts dancing from the warm breeze in the trees is a fun way to celebrate Valentine's Day, a wedding shower, and my parents 60th wedding anniversary.  I played with more colors than red and pink to make them more playful. Then used Glitter, metallic, and matte texture card stock to add the flutter of the hearts swag. 


The hearts cut from my Silhouette Cameo are four different sizes. Each one has a small double hole punch to tie and space the fishing line to make each swag
The hearts cut from my Silhouette Cameo are four different sizes. Each one has a small double hole punch to tie and space the fishing line to make each swag. The hearts splash of color in the trees as they sway in the breeze. The glitter and metallic card stock glimmer with splashes of sunlight.

As Valentine's Day is coming thoughts of love is in the air come to mind. I am sure there will be engagements, weddings and anniversaries to celebrate.
I even used the leftover card stock to add to the table by them to add a pop of color on the white and lace table clothes. These would be cute to add on top of place mats or under your tablescape for a sweetheart dinner to celebrate your love.

Fly along my blogging journey with me (Click links below to  stay connected)                           
     
                 Pinterest   Facebook    Google +    Twitter   Instagram   BlogLovin

 ~ Let Your Creative Spirit Dance  ~

Until Next Time,

Karen Marie


2015 Blog Planner Designed For Dragonfly & Lily Pads

Dancing In The Craft Room II

Ikea Computer Cabinet Transformed Into Craft Cabinet


Create Craft Room Labels

Monday, January 13, 2014

Welcome to the First Silhouette Challenge of 2014

    This month we were asked to add a project which involved getting organized.  This is the first event I am participating in since I am a new member of this group. I am honored to share this page with others who share a passion for learning, growing, sharing ideas, all while using my favorite item in my craft room The Silhouette Cameo. Heck I liked it so much I bought two. 
   Today I am sharing a new project I have never done before with you. I am just starting to design my craft room at my White Picket Fence Home. This is my first time using the my printer, with the registration marks, then cut with the Cameo. I have to say I am amazed at how this machine works.
   Alright it is time for directions to success!!!!!

The first item on our list today is measure your length and width of the size of the labels you need. In my case the Recollection File Drawer is 2" wide and 1" high. Then I made one rectangle to these measurements. I hit fill page but felt that was to close for comfort, so I decided to leave a space between each label by duplicating and pasting to my desired  page. This way even if I was off on the printing it would still leave room to cut around the labels.
  I chose colors that coordinated so each type of supplies is easy to spot by color as well as words. here is the process in pictures.
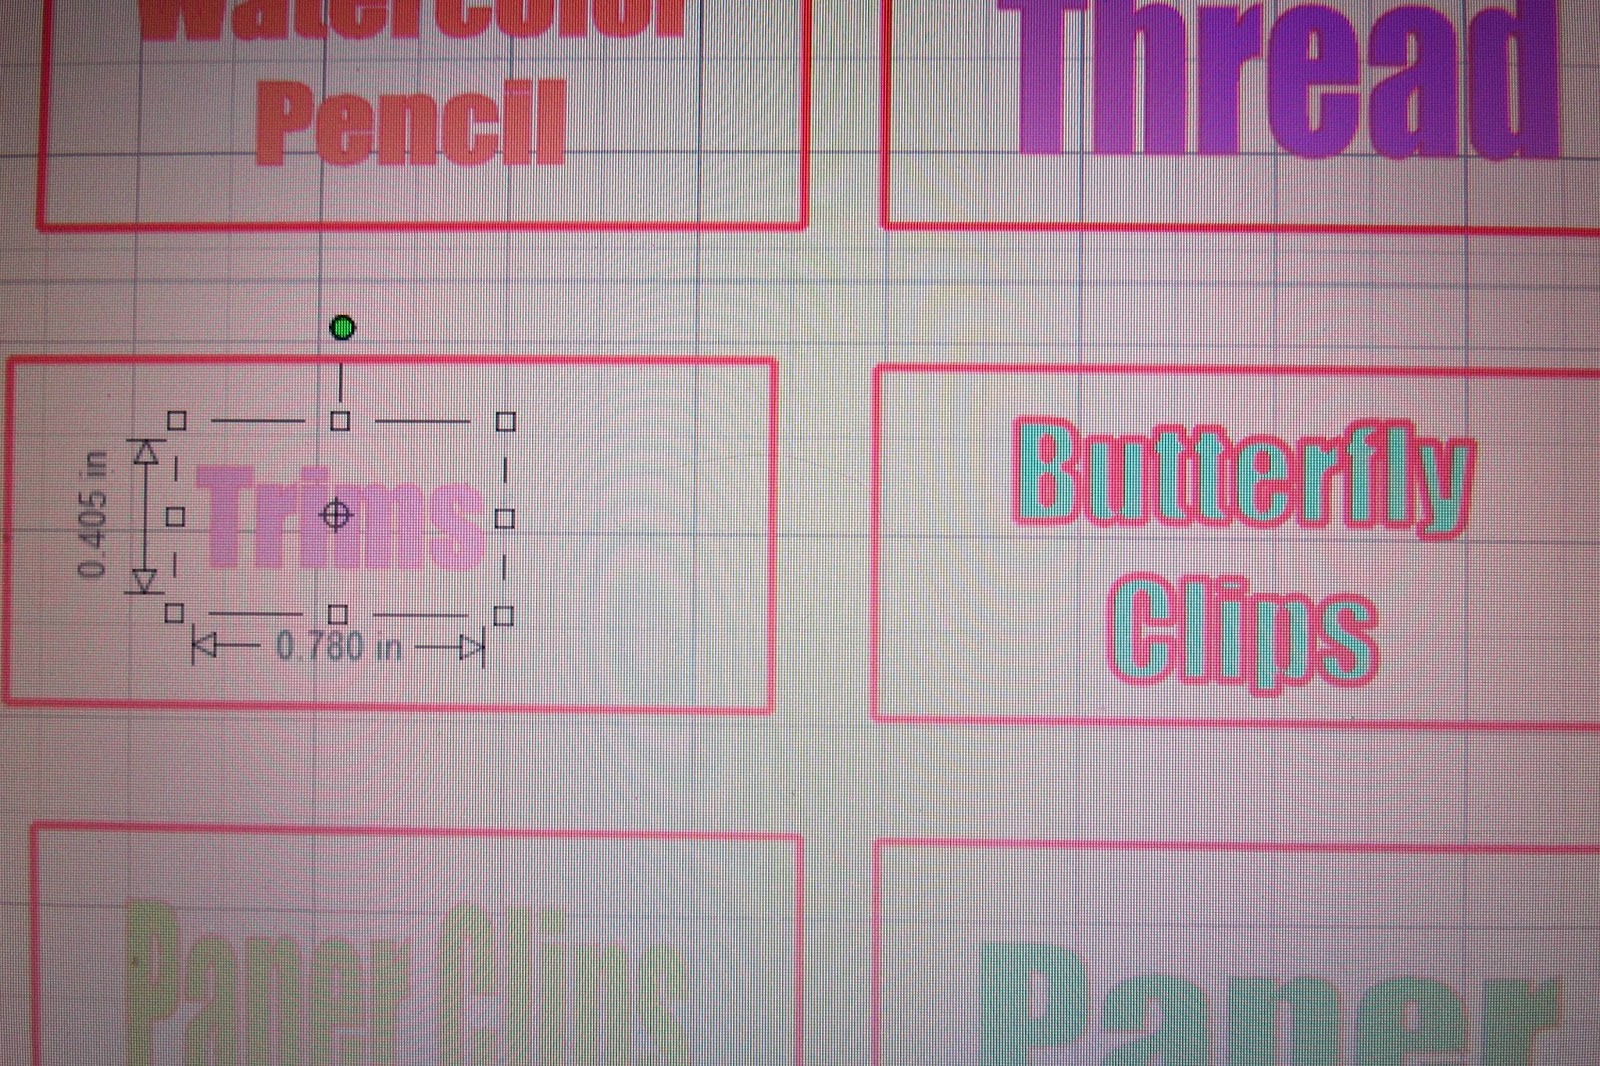
This is how my page looked with rectangles and words typed in place. See below the screen has with the cut lines around the words Butterfly Clips. Since we do not want to cut these lines I have demonstrated the images to click on to remove theses cut line form the pattern. 
 Highlight the word Trims, then click The Scissor Symbol, next click No Cut  

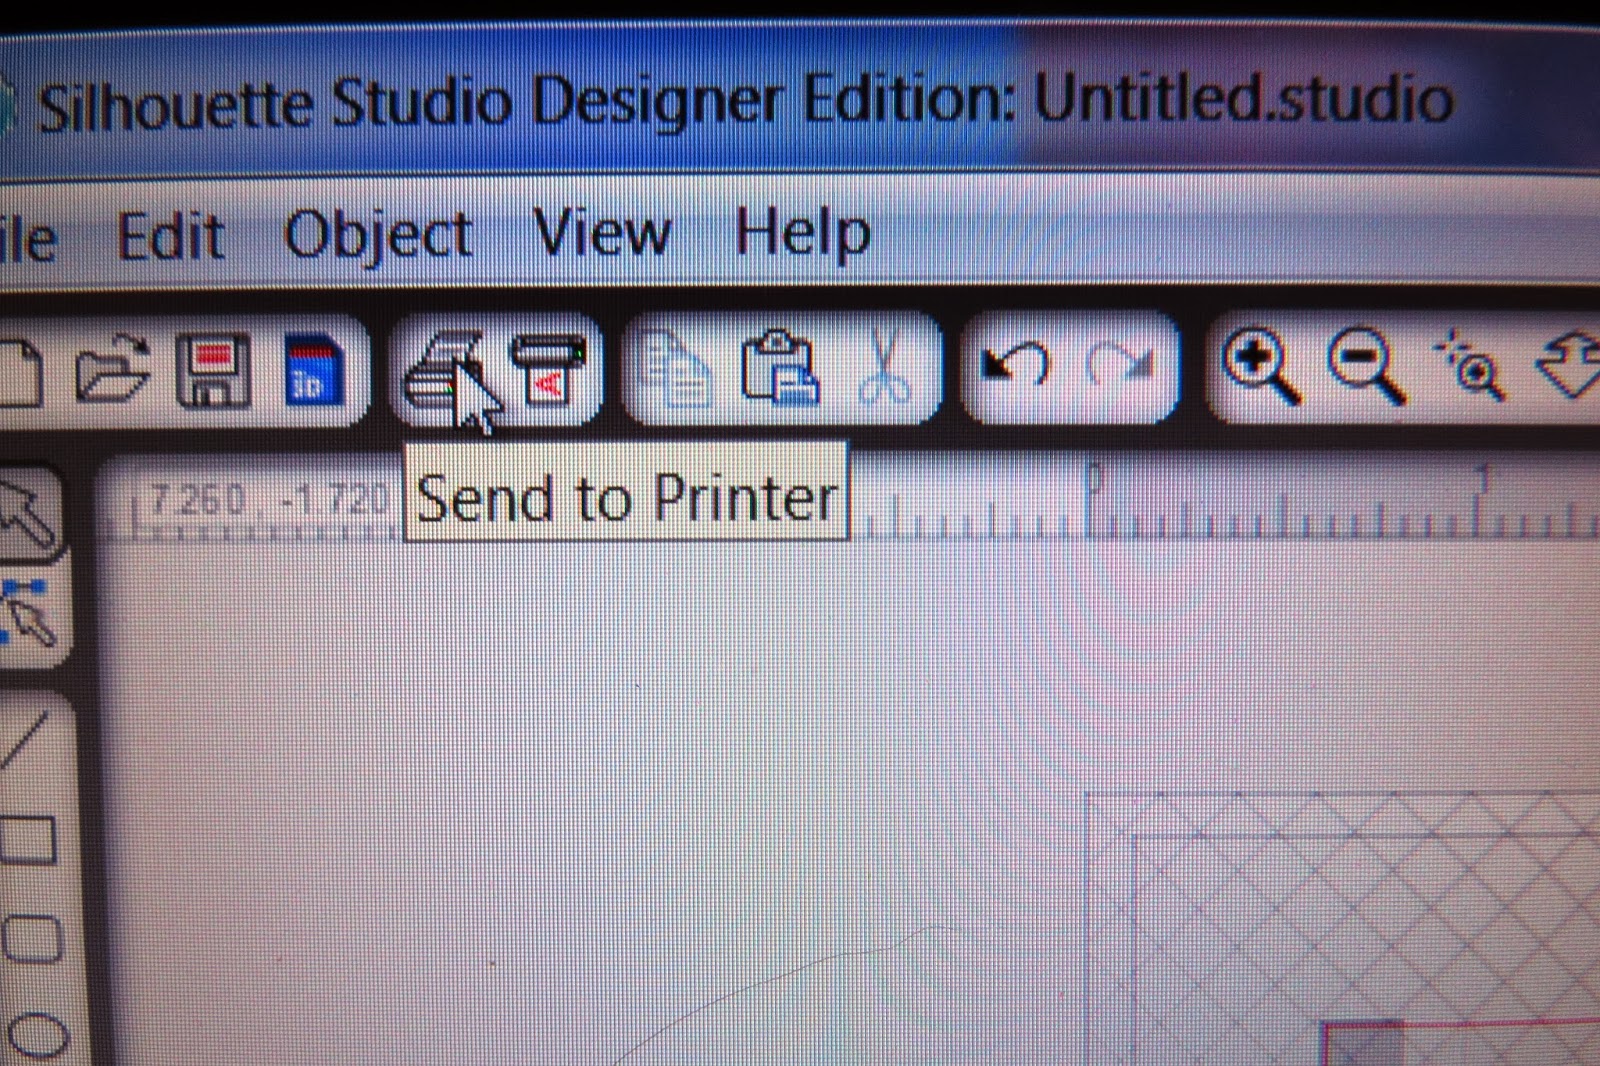
Make sure you have the  registration  marks on and send to printer


This picture shows what the registration marks
look like on the printed page.
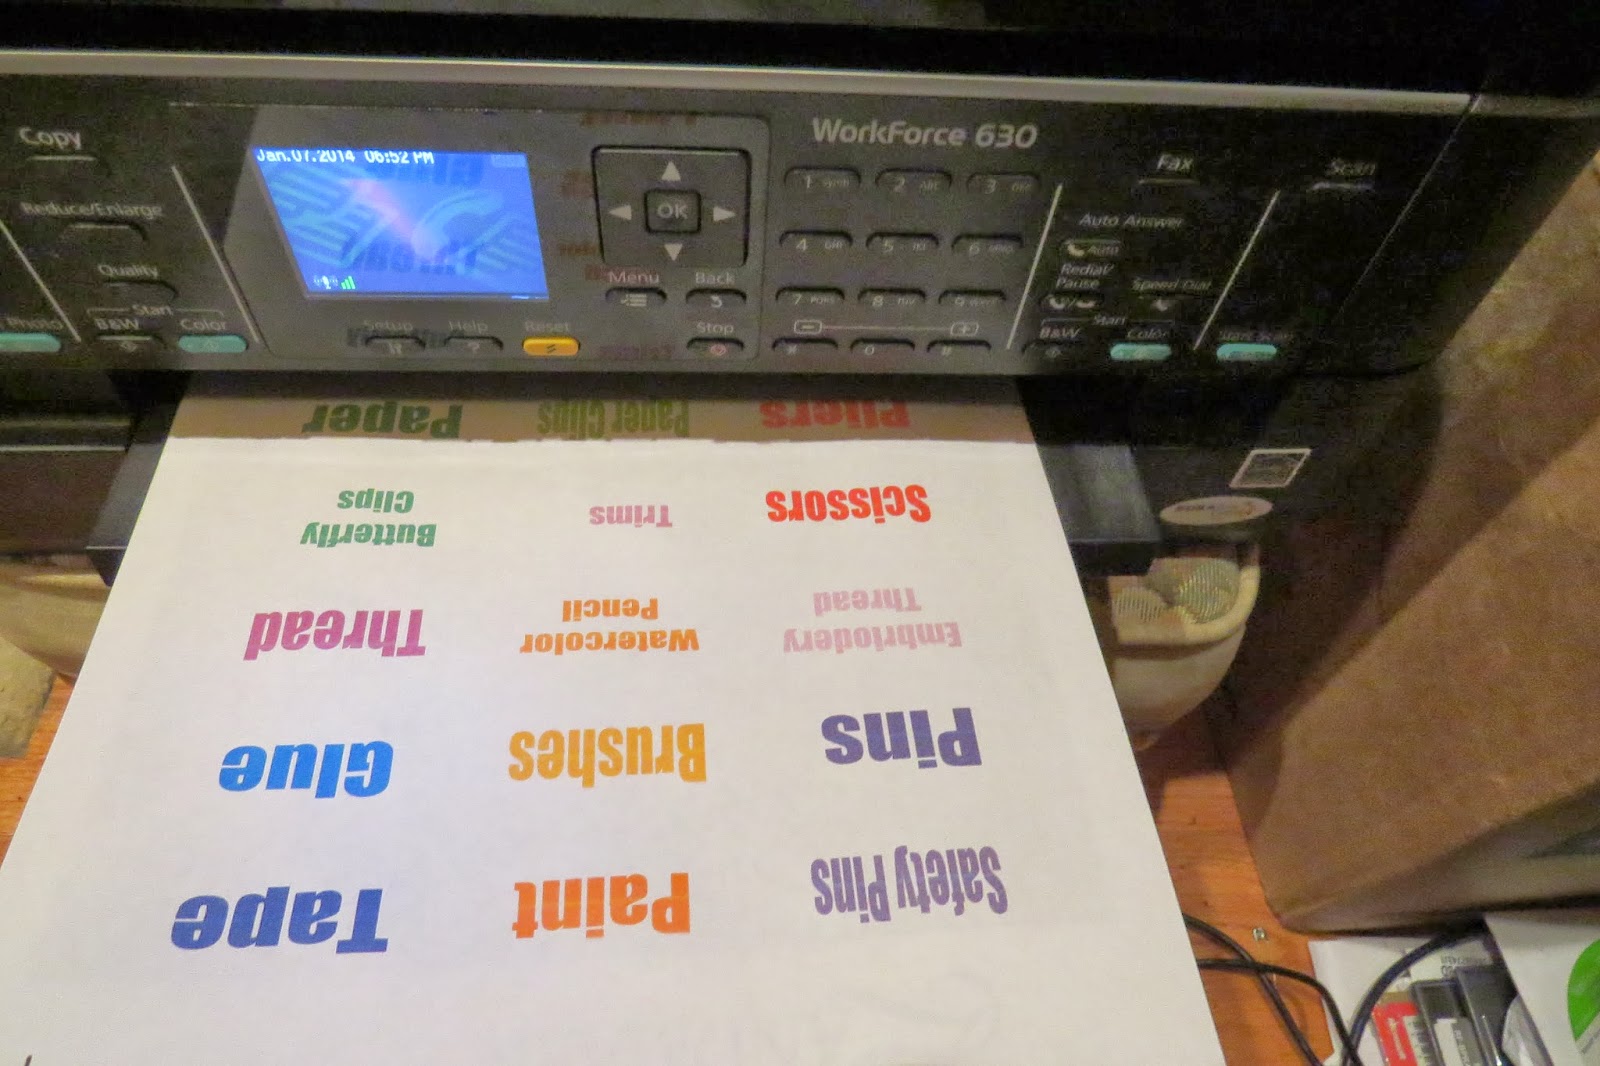
This is how the paper will look when it comes out of the printer                                                                    
Set your paper to 8 1/2" X 11" place on your mat as pictured above


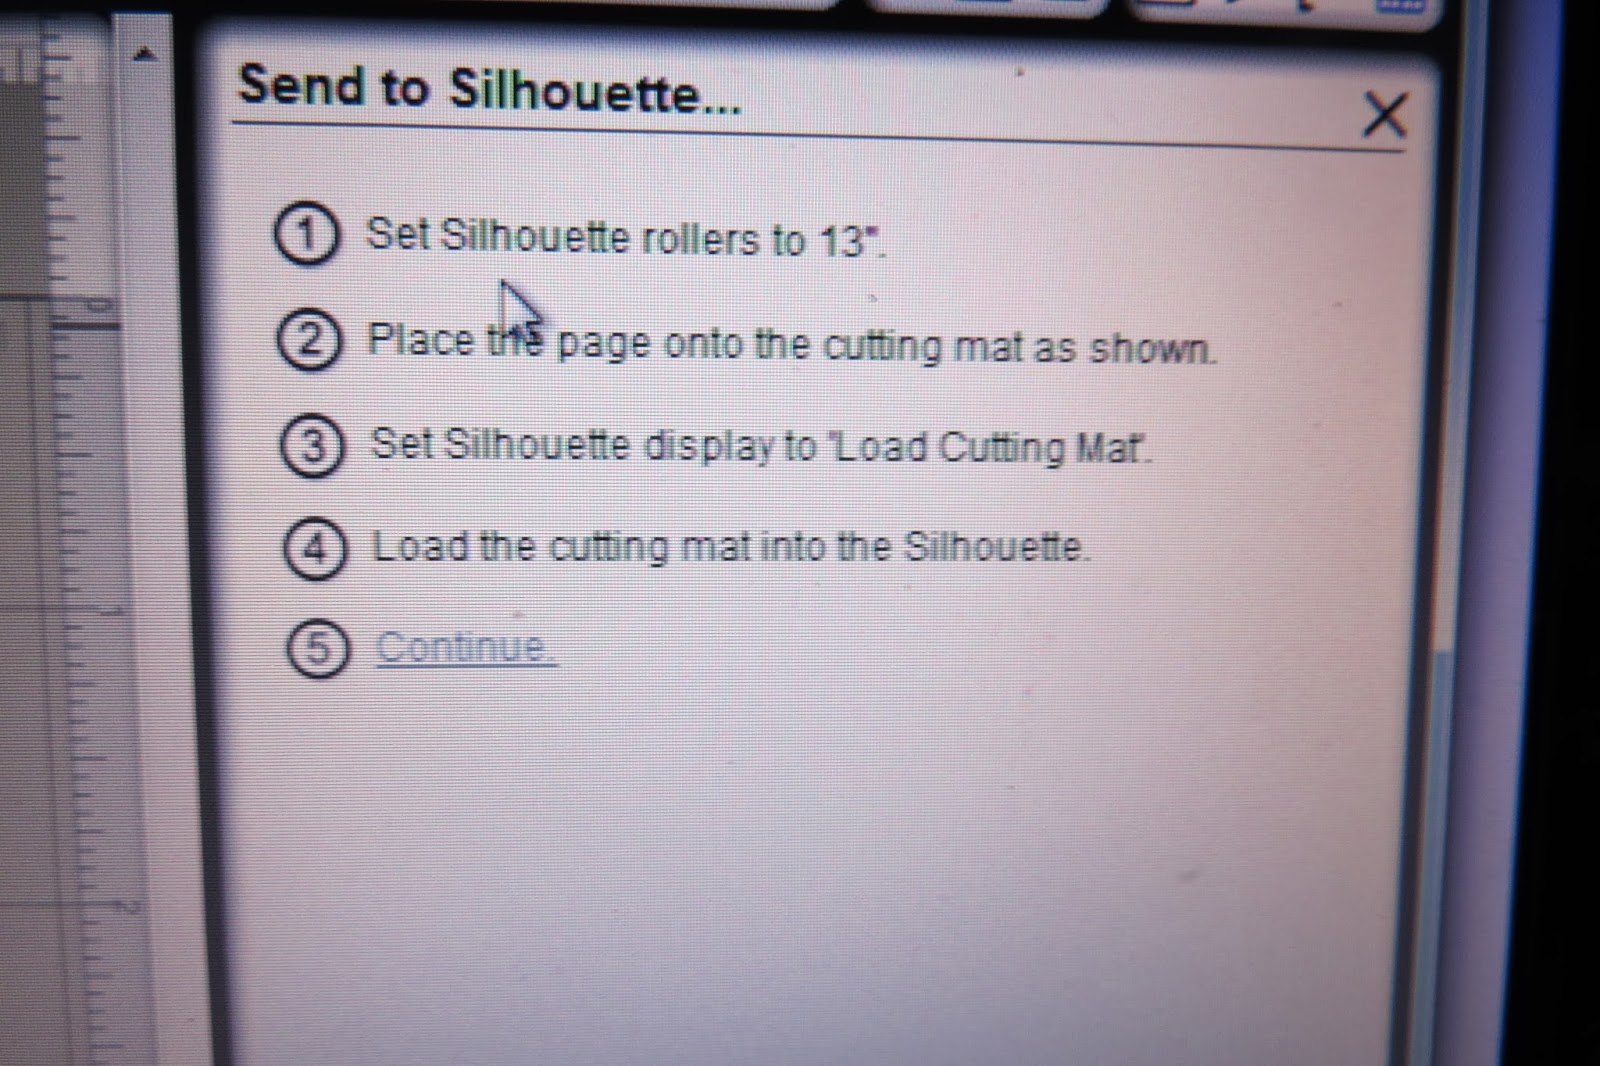
        Follow the directions on the screen.
This is a picture of the Cameo processing the cuts.


 Set the blade to the right setting for the material you are cutting.
   
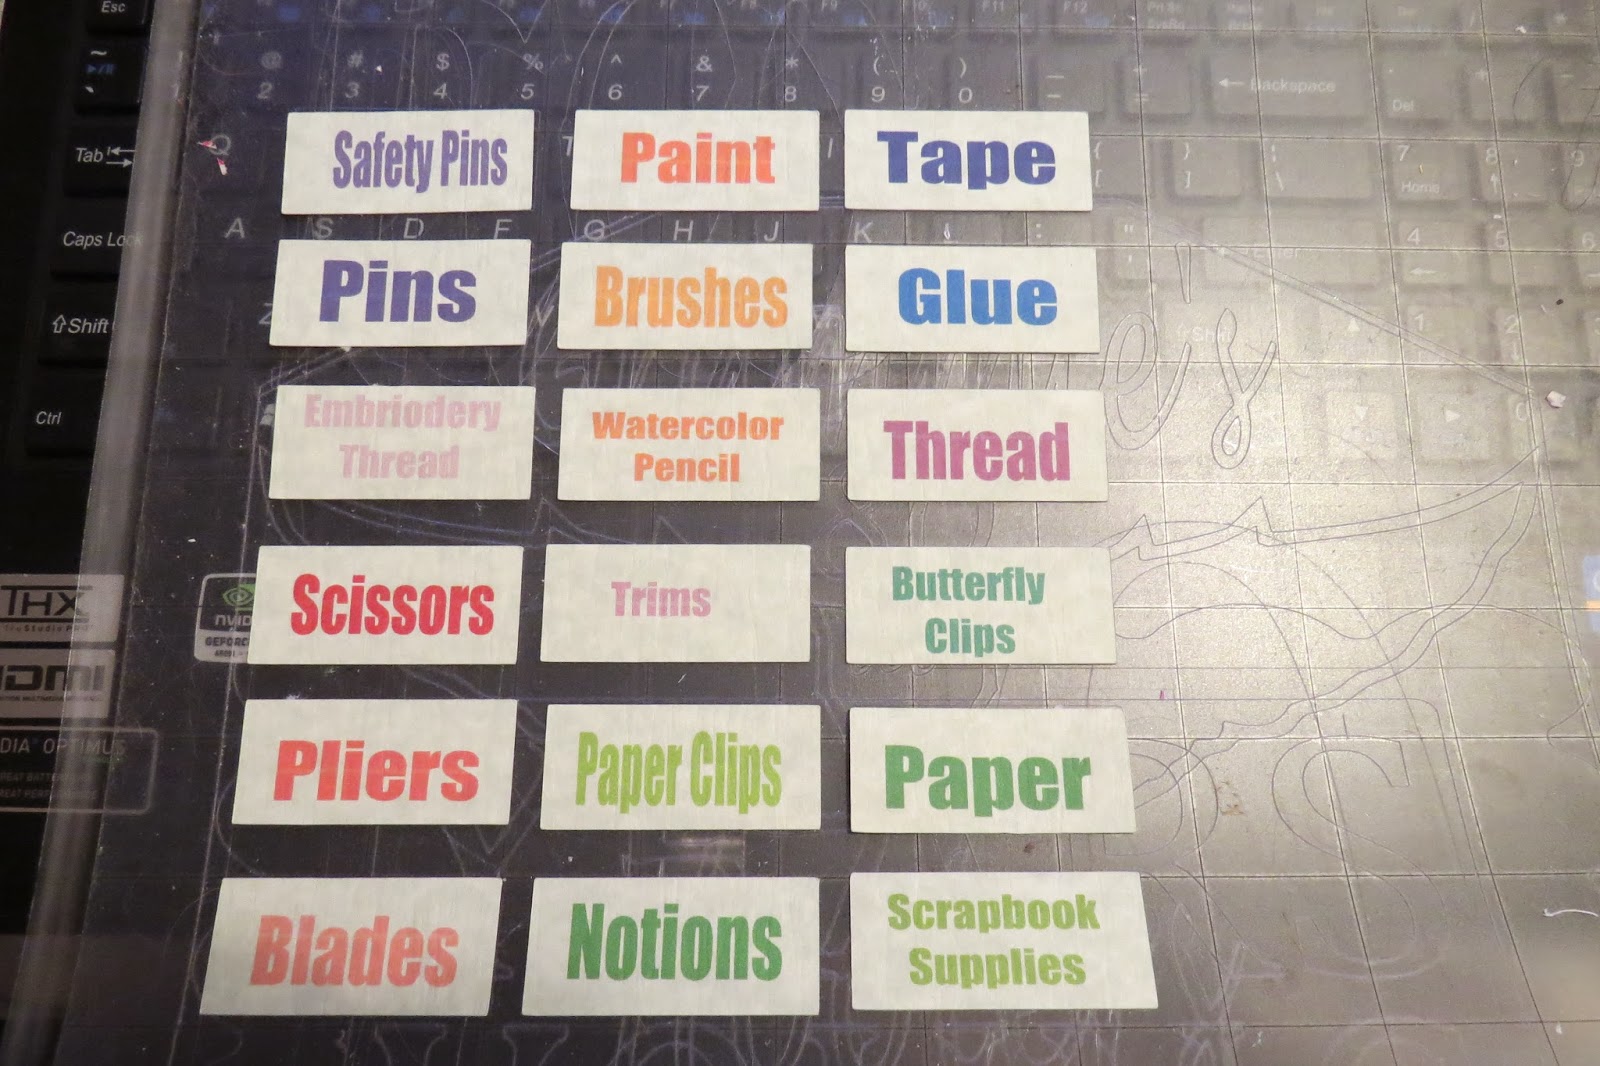
This is the way the labels look weeded.


This is the promise of a new Craft room and the Start of a many friendships through Silhouette Challenge.

Thank you for joining me during this tutorial. I hope this helps you move towards trying a new project yourself. Please share your comments and thoughts with me because, I Love to here from my readers and blogger buddies.


 On behalf of The Silhouette Challenge Team Welcome to 2014!
 Each Month we will be presenting a wealth of ideas and information to help you use your Silhouette Cameo or Portrait. 
Join Me in learning from 35 of my team members who posted to this Months Event!

January's theme is Organization


  1. DIY Window Shutter Mail Organizer by Weekend Craft
  2. Kids' Art Wall by Tried & True
  3. Organizing Silhouette and Craft Supplies by The Happier Homemaker
  4. Simple Recipe Organization by It's Always Craft Time
  5. Put a Label on it! Herb Names for Plant Stakes by Get Silvered
  6. Super Simple Linen Closet Labels by Two Purple Couches
  7. Beware of the Animals Vinyl Toy Box by A Tossed Salad Life
  8. Child desk accessories by Architecture of a Mom
  9. Organizing & the Important of Labels by The Turquoise Home
  10. Index Card Organizer for Easier Meal Planning by Chicken Scratch NY
  11. Create Craft Room Labels by Dragonfly & Lilypads
  12. Simple Storage Solution for your Christmas Ornaments by Vintage News Junkie
  13. Organize this: DIY Planner Covers, Tags & Dividers (made with Cereal Boxes) by Black and White Obsession
  14. How to Make a Cut File into a Print & Cut by Create & Babble
  15. Simple Chest Freezer Organizational Board by Nearly Handmade
  16. Vinyl Your Kitchen Canisters! by From Wine to Whine
  17. Nursery Closet Dividers & Silhouette Cut File by Creative Ramblings
  18. Make Custom Box Templates with a Silhouette for Drawer Organization by One Dog Woof
  19. Organizing the Craft Room by What's Next Ma
  20. Vinyl Wall Calendar by Crafts Cakes and Cats
  21. Personalized Toy Storage Bins by Lil' Mrs. Tori
  22. Personalized Routine Chart by Work in Progress
  23. Blog Planner Sheet Dividers + Free Cut Files by TitiCrafty by Camila
  24. Simple Project Calendar by Little Blue's Room
  25. Dry Erase Photo Frame Menu Board + Free Cut File by Essentially Eclectic
  26. Receipt Organization with Free Cut File by The Thinking Closet
  27. Cute and Easy Labels by Life After Laundry
  28. "What's For Dinner?" Menu Planning Board by unOriginal Mom
  29. Mixing Organization and Function: An Easy Conversion Chart by My Paper Craze
  30. Why do my cookies taste so bad? A lesson in baking. by The Life and Times of a TAP
  31. Custom Drawer Dividers by Please Excuse My Craftermath...
  32. The evolution of my labeling system by feto soap
  33. Ikea Drawer labels by McCall Manor
  34. Glass Etched Vinegar  & Oil bottles by Terri Johnson Creates
  35. Organize It: Bathroom Closet by The House on Hillbrook
  36. Ombre Butterfly Magnet Board by Sowdering About


Crafting is always Better with Friends

Show your appreciation we are all volunteers

Please feel free to Share but,
 always give the original post credit.

Blogging love is always accepted and appreciated,
 You know the drill Click away!