Sweetheart Garland or Streamers

Thursday, January 30, 2014

     Hearts dancing from the warm breeze in the trees is a fun way to celebrate Valentine's Day, a wedding shower, and my parents 60th wedding anniversary.  I played with more colors than red and pink to make them more playful. Then used Glitter, metallic, and matte texture card stock to add the flutter of the hearts swag. 


The hearts cut from my Silhouette Cameo are four different sizes. Each one has a small double hole punch to tie and space the fishing line to make each swag
The hearts cut from my Silhouette Cameo are four different sizes. Each one has a small double hole punch to tie and space the fishing line to make each swag. The hearts splash of color in the trees as they sway in the breeze. The glitter and metallic card stock glimmer with splashes of sunlight.

As Valentine's Day is coming thoughts of love is in the air come to mind. I am sure there will be engagements, weddings and anniversaries to celebrate.
I even used the leftover card stock to add to the table by them to add a pop of color on the white and lace table clothes. These would be cute to add on top of place mats or under your tablescape for a sweetheart dinner to celebrate your love.

Fly along my blogging journey with me (Click links below to  stay connected)                           
     
                 Pinterest   Facebook    Google +    Twitter   Instagram   BlogLovin

 ~ Let Your Creative Spirit Dance  ~

Until Next Time,

Karen Marie


2015 Blog Planner Designed For Dragonfly & Lily Pads

Dancing In The Craft Room II

Ikea Computer Cabinet Transformed Into Craft Cabinet


Mod Podge Miracle

Tuesday, January 21, 2014

     If you have read my blog before you know our lake home is named Dragonfly. If you haven't read the story you might want to read here to catch-up. The first week we spent at the lake house was in middle of  Winter 2012. We had plenty to do with picking out what furniture should go where, selecting how we would use the space in the house and what priorities should be on the top of our list. Well of course, we all know that a girl must put her own touch on her home, with Prince Charming's approval. Tee Hee! Pier Imports had a few items I was looking for, along with a coupon of course. So as any good husband would do, for his lady, off to the store we went, with coupon in hand. I found a beautiful dragonfly vase and bought two right away. One for my girlfriend whose Dad had passed away and one for the lake home. We saw a few other items we were interested in but wanted to be sure we would use them.
 By early Spring I was on a first name bases with the Manager of the store, at that time it was (Steve). We had become Platinum Members of the savings club. Our home was shaping up nicely. I bought another dragonfly vase for my girlfriends sister for a birthday gift. As luck would have it my darling guy had a little accident and broke it while transporting it. Oh well accidents happen so we bought another. Is there anything better then platinum is what your thinking right? Ok, now three girls, who love dragonflies, each have a vase! Success Right? For a while every thing was perfect in dragonfly world, until one fine Spring day I bought myself some flowers, stuck them proudly in the vase, sat back, and took in the view. Brilliant you might say but, when it came time to clean out the vase that yuck line, that you get from the water, would not budge. Since it did not say," Do Not Use Dishwasher", clearly that would work. CLEARLY it did because that is exactly how it came of the dishwasher. Clean and glistening with not a touch of color, or a thought of a dragonfly. I thought I couldn't fix the vase, so I left it sparkle, filled it with fake flowers and called it day. 
  I toyed around with the idea of painting it myself.  As you can see in the picture below my first attempt was not successful. I set the vase aside again, thinking about scraping off the painting I had started.
I found these napkins at Pier 1 Imports, on sale naturally. Bought +Mod Podge at +Joann Fabrics. I never used this product  before but, I figured it can't look any worse then it already turn out. 
 To make the napkins more sheer I took two white layers of paper off the napkin. This made only pattern translucent. I painted on the Mod Podge and then applied the napkin on top. I was surprised it dried faster then the directions explained. After placing the first napkin, I figured I would just place the next one, matching up the patterns similar to sewing. Nope, the patterns did not follow one another, so I had to tear and paste the pieces together matching each one. A few places just did not match so I used my creative license to make the pattern pleasant to your eyes. This is what it look like before I put the final coat of Mod Podge to seal the vase.

 Here is the vase in its current place in our Dragonfly Pad as we call it for blog. I am very pleased with the completed project. It does not look exactly like the original but, now I have a one of a kind vase that, I know Not To Wash It In The Dishwasher. 

 It sits atop an antique back bar from a lake home in Kansas City, MO. 
I love the red flowers, purple dragonflies and soft shades of green. There is also pink, white, lavender, yellow and deeper green flowers in 
the paper napkin pattern. I think it turned out beautiful, which is why I called it a miracle because, I thought I had melted my dragonfly vase. Who knew napkins with Mod Podge & gold paint could save my vase.

Stay warm and toasty while crafting your way through this Polar Vortex!


You have taken your time to view my blog. Please leave a comment so I can thank you personally. I would love to read your cleaning blunders show a girl some blog love.

Create Craft Room Labels

Monday, January 13, 2014

Welcome to the First Silhouette Challenge of 2014

    This month we were asked to add a project which involved getting organized.  This is the first event I am participating in since I am a new member of this group. I am honored to share this page with others who share a passion for learning, growing, sharing ideas, all while using my favorite item in my craft room The Silhouette Cameo. Heck I liked it so much I bought two. 
   Today I am sharing a new project I have never done before with you. I am just starting to design my craft room at my White Picket Fence Home. This is my first time using the my printer, with the registration marks, then cut with the Cameo. I have to say I am amazed at how this machine works.
   Alright it is time for directions to success!!!!!

The first item on our list today is measure your length and width of the size of the labels you need. In my case the Recollection File Drawer is 2" wide and 1" high. Then I made one rectangle to these measurements. I hit fill page but felt that was to close for comfort, so I decided to leave a space between each label by duplicating and pasting to my desired  page. This way even if I was off on the printing it would still leave room to cut around the labels.
  I chose colors that coordinated so each type of supplies is easy to spot by color as well as words. here is the process in pictures.
This is how my page looked with rectangles and words typed in place. See below the screen has with the cut lines around the words Butterfly Clips. Since we do not want to cut these lines I have demonstrated the images to click on to remove theses cut line form the pattern. 
 Highlight the word Trims, then click The Scissor Symbol, next click No Cut  

Make sure you have the  registration  marks on and send to printer


This picture shows what the registration marks
look like on the printed page.
This is how the paper will look when it comes out of the printer                                                                    
Set your paper to 8 1/2" X 11" place on your mat as pictured above


        Follow the directions on the screen.
This is a picture of the Cameo processing the cuts.


 Set the blade to the right setting for the material you are cutting.
   
This is the way the labels look weeded.


This is the promise of a new Craft room and the Start of a many friendships through Silhouette Challenge.

Thank you for joining me during this tutorial. I hope this helps you move towards trying a new project yourself. Please share your comments and thoughts with me because, I Love to here from my readers and blogger buddies.


 On behalf of The Silhouette Challenge Team Welcome to 2014!
 Each Month we will be presenting a wealth of ideas and information to help you use your Silhouette Cameo or Portrait. 
Join Me in learning from 35 of my team members who posted to this Months Event!

January's theme is Organization


  1. DIY Window Shutter Mail Organizer by Weekend Craft
  2. Kids' Art Wall by Tried & True
  3. Organizing Silhouette and Craft Supplies by The Happier Homemaker
  4. Simple Recipe Organization by It's Always Craft Time
  5. Put a Label on it! Herb Names for Plant Stakes by Get Silvered
  6. Super Simple Linen Closet Labels by Two Purple Couches
  7. Beware of the Animals Vinyl Toy Box by A Tossed Salad Life
  8. Child desk accessories by Architecture of a Mom
  9. Organizing & the Important of Labels by The Turquoise Home
  10. Index Card Organizer for Easier Meal Planning by Chicken Scratch NY
  11. Create Craft Room Labels by Dragonfly & Lilypads
  12. Simple Storage Solution for your Christmas Ornaments by Vintage News Junkie
  13. Organize this: DIY Planner Covers, Tags & Dividers (made with Cereal Boxes) by Black and White Obsession
  14. How to Make a Cut File into a Print & Cut by Create & Babble
  15. Simple Chest Freezer Organizational Board by Nearly Handmade
  16. Vinyl Your Kitchen Canisters! by From Wine to Whine
  17. Nursery Closet Dividers & Silhouette Cut File by Creative Ramblings
  18. Make Custom Box Templates with a Silhouette for Drawer Organization by One Dog Woof
  19. Organizing the Craft Room by What's Next Ma
  20. Vinyl Wall Calendar by Crafts Cakes and Cats
  21. Personalized Toy Storage Bins by Lil' Mrs. Tori
  22. Personalized Routine Chart by Work in Progress
  23. Blog Planner Sheet Dividers + Free Cut Files by TitiCrafty by Camila
  24. Simple Project Calendar by Little Blue's Room
  25. Dry Erase Photo Frame Menu Board + Free Cut File by Essentially Eclectic
  26. Receipt Organization with Free Cut File by The Thinking Closet
  27. Cute and Easy Labels by Life After Laundry
  28. "What's For Dinner?" Menu Planning Board by unOriginal Mom
  29. Mixing Organization and Function: An Easy Conversion Chart by My Paper Craze
  30. Why do my cookies taste so bad? A lesson in baking. by The Life and Times of a TAP
  31. Custom Drawer Dividers by Please Excuse My Craftermath...
  32. The evolution of my labeling system by feto soap
  33. Ikea Drawer labels by McCall Manor
  34. Glass Etched Vinegar  & Oil bottles by Terri Johnson Creates
  35. Organize It: Bathroom Closet by The House on Hillbrook
  36. Ombre Butterfly Magnet Board by Sowdering About


Crafting is always Better with Friends

Show your appreciation we are all volunteers

Please feel free to Share but,
 always give the original post credit.

Blogging love is always accepted and appreciated,
 You know the drill Click away! 


50 % to 80% Off now that is a DEAL!

Wednesday, January 8, 2014

     Holidays Sales may be winding down but this sale rocked the scales with some huge savings. I am currently creating my First Creative Space!!!!! Can you tell I am excited? I bought a rug about 2 years ago on sale, to start the space, but some little bumps in the road, and challenges changed my path. Well I am back on track, saving,creating and filled with the joy of anticipation, to see how I develop My Space. Luckily since I broke my Elbow, my trusty Prince Charming is helping me assemble, lift, arrange my space too. All the while he is looking more handsome than ever, holding down the fort, and helping take care of me. He is truly the one who can bring home the bacon, and fry it up in a pan, never letting me me forget he is my Man. Tee-Hee. OH Lord I am dating myself!
   On a -13 degree day my son needed to go back to College. The short version of this story is on the way home he insisted he wanted to get +WeatherTech liners for my new car. I thought we should go home but, went along because he was right. Yes Ladies I said he was right! This post is turning out to make him look AWESOME! His timing could not have been better, we were already near the Outlet, and it happened to be two miles from the school we dropped our son off at to work, and ride home with the Basketball Teams of his College. We walked in and were the only costumers in the store. That took about twenty minutes for us to decide how the product they have would work best for us, he want outside to put them in the car. I was not going out in that frigid weather, nor did I want to hurt my elbow. We waited a few minutes for Prince Charming to warm up at the complimentary food and beverage counter. Yummy!
   Now we are on the road again, and as we are driving, I am in awe of the beauty of the snow painting each limb, snapping pictures with my cellphone. Why did I not bring my good camera? Well to be honest I forgot but, the extreme cold would not be good for it anyway. My cellphone fits in my pocket and was warm.

 Next Stop home one
 would think, but wait +Michaels Crafts is already right next us us on the corner, and they are having a Huge Sale. Well my Prince, said let's go and I have to admit I hesitated. Yes I have my head held down in Craft Shame.
  About an hour later after filling two carts I am in Craft Heaven.
1/2 price frames + an extra 15% off .........Check
1/2 Storage from +Recollections...............Check
80% off Christmas.................Singing Fa La La  Stock up for next year.................Check
1/2 Bulk Paper......Score for the Auction I am running in a couple weeks................Check

   Alright I know you want to see what I bought but one more thing happened.Our son working at another store calls my husband. My car won't start I need a jump. So when we arrived home he picked up the jumper cables. Left my car loaded and went to store to help our son. Our son arrived home safely my husband went to a wake picked up dinner and then unloaded the car. I think I am going to nominate him for Sainthood. I have to go take pictures now.
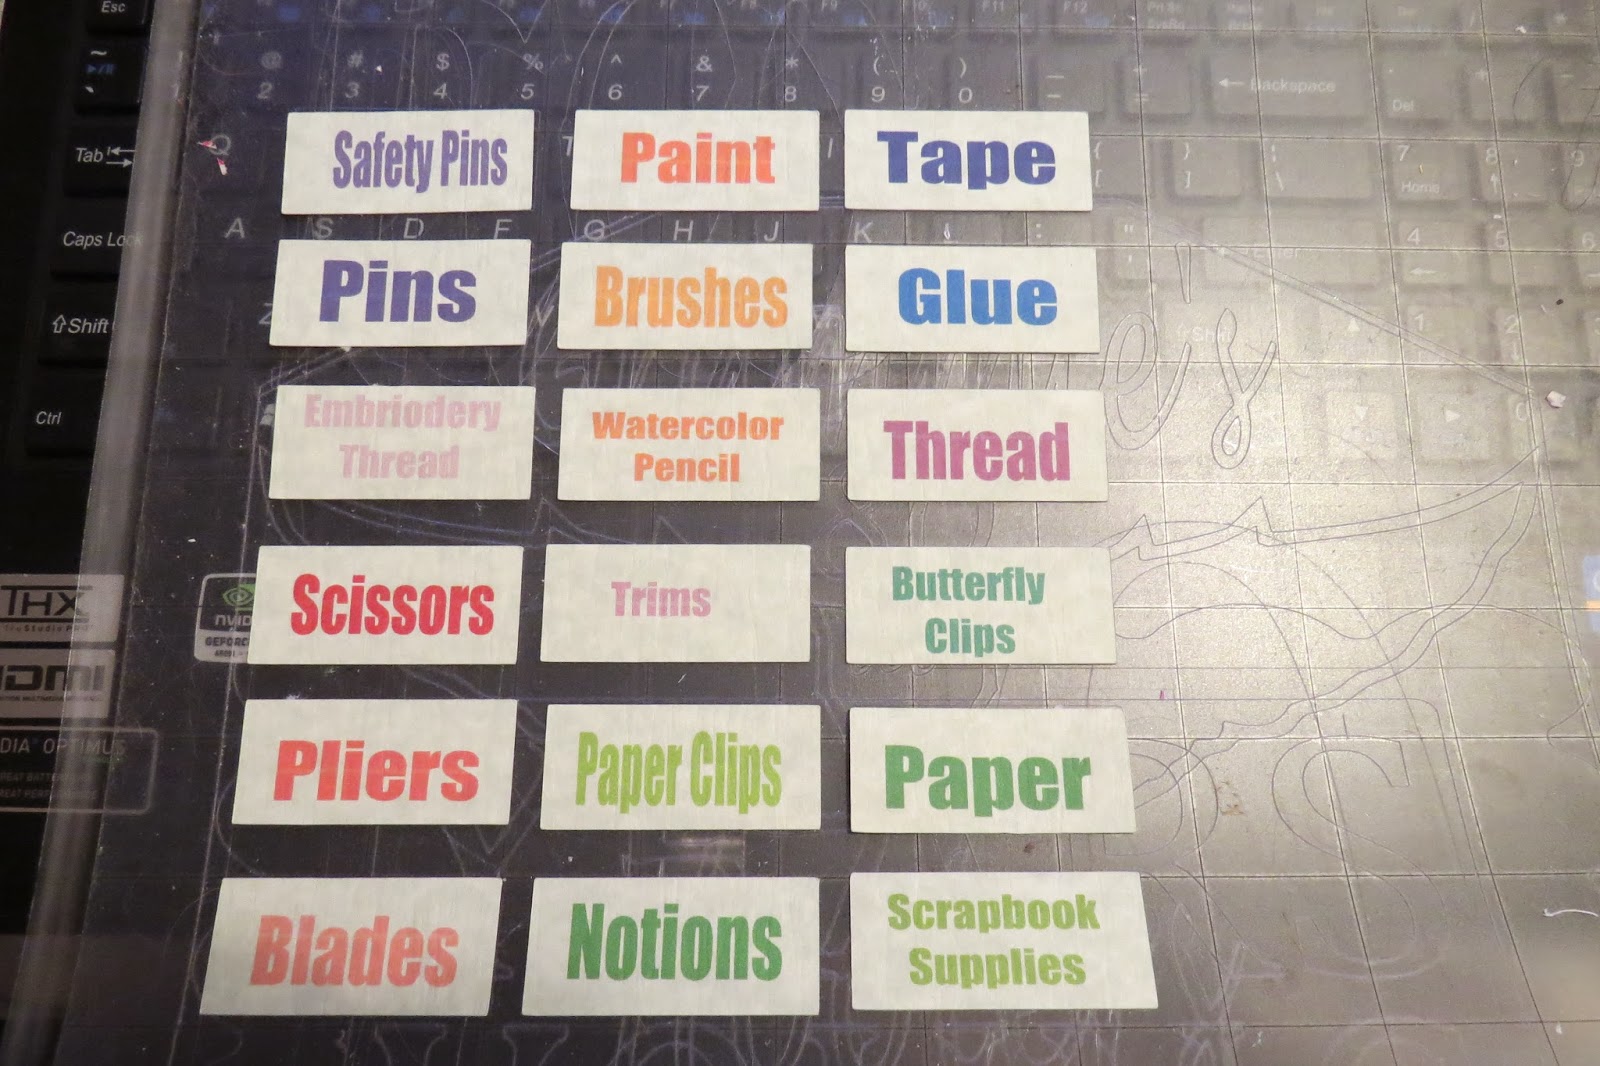
So here are the pictures of my Sale Loot!!!!!

Here is a little Sneak Peek!  You did not think I would show you it ALL?


 Yes he even already put them all together for me. Pinch me I am feeling Tingles.


I have so much to share with you in the coming weeks. I have been working on some new projects,  while stretching my blogging wings toward some new adventures.              
                Until Next time Stay warm and share your Creativity!


Dragonfly Pad

Wednesday, January 1, 2014


Dragonfly Pad

I just started this post with the thought of a year in review to stay on trend. I kept starting it over, deleting,  rewriting, and changing the title, but this was what my heart wanted to share with you today.

 This is the first picture I posted and how my blog became Dragonfly & Lily Pads.
The Dragonfly
Once, in a little pond, in the muddy water under the lily pads,
there lived a little water beetle in a community of water
beetles.  They lived a simple and comfortable life in the pond
with few disturbances and interruptions.

Once in a while, sadness would come to the community when one of
their fellow beetles would climb the stem of a lily pad and
would never be seen again.  They knew when this happened; their
friend was dead, gone forever.

Then, one day, one little water beetle felt an irresistible urge
to climb up that stem.  However, he was determined that he would
not leave forever.  He would come back and tell his friends what
he had found at the top.

When he reached the top and climbed out of the water onto the
surface of the lily pad, he was so tired, and the sun felt so
warm, that he decided he must take a nap.  As he slept, his body
changed and when he woke up, he had turned into a beautiful
blue-tailed dragonfly with broad wings and a slender body
designed for flying.

So, fly he did!  And, as he soared he saw the beauty of a whole
new world and a far superior way of life to what he had never
known existed.

Then he remembered his beetle friends and how they were thinking
by now he was dead.  He wanted to go back to tell them, and
explain to them that he was now more alive than he had ever been
before.  His life had been fulfilled rather than ended.

But, his new body would not go down into the water.  He could
not get back to tell his friends the good news.  Then he
understood that their time would come, when they, too, would
know what he now knew.  So, he raised his wings and flew off
into his joyous new life!


~Author Unknown~

When we found our lake home in 2011. I sat in front of the house on the broken pier and felt at peace. There in front of me, on a warm late spring day danced dragonflies, and next to me, as you can see in the picture above, those lily pads.  
So our lake home, where we go to find peace, sometimes quiet, other times busy loud fun with family, and friends is our place. 
Cricket is Fishing while I work on planting flowers my chair is waiting for me to take a break!
 The house was named Dragonfly simply because, it is a symbol of loved ones who came before us, loved ones who are here with us, and helped us get to this point. Some day I will watch with glee, our loved ones who follow us in this home, of love, peace, joy, happiness, filled with memories made, happening ,and to come. 


Cricket and I taking a moment to enjoy my favorite place on the broken pier.
The pier was removed the next day to be replaced by a new seawall.


Yes you are correct if you are thinking that is part of the pier. The top picture is my son and husband taking apart the part of the pier that was not underwater. The bottom picture is the section of the pier that was below water for years. Did you know that wood underwater is preserved? So of course being the Creative person that I am, we certainly could not dump the good wood.
I have several different ideas of how I want to use the materials. This is going to be a project for the Spring. As of know I am thinking of a Secret Garden behind the house, but for know I am taking suggestions.
Please add your ideas in the comments.
When the project is decided I will let you in on the decision, plus you will be able to follow
along on the progress of the recycled pier project on the blog.

Happy New Year to each one of you who take the time to include me in your day by reading my posts.
Thank you to all the new people I have made connections with during this 2 1/2 Months of this new blog world.
 I plan on building friendships, networks, while continuing to learn, how to share my passion for all things creative with others.
I wish you all a Healthy, Happy, Prosperous 2014!