The Blogger Christmas Series was created to bring you a wealth of ideas to celebrate the season with many bloggers. She has rounded up several different blogs from around the country for the last few weeks. Thank you +Christine Graves for coordinating, as well as orchestrating these beautiful packages wrapped up for all of us to share with our readers
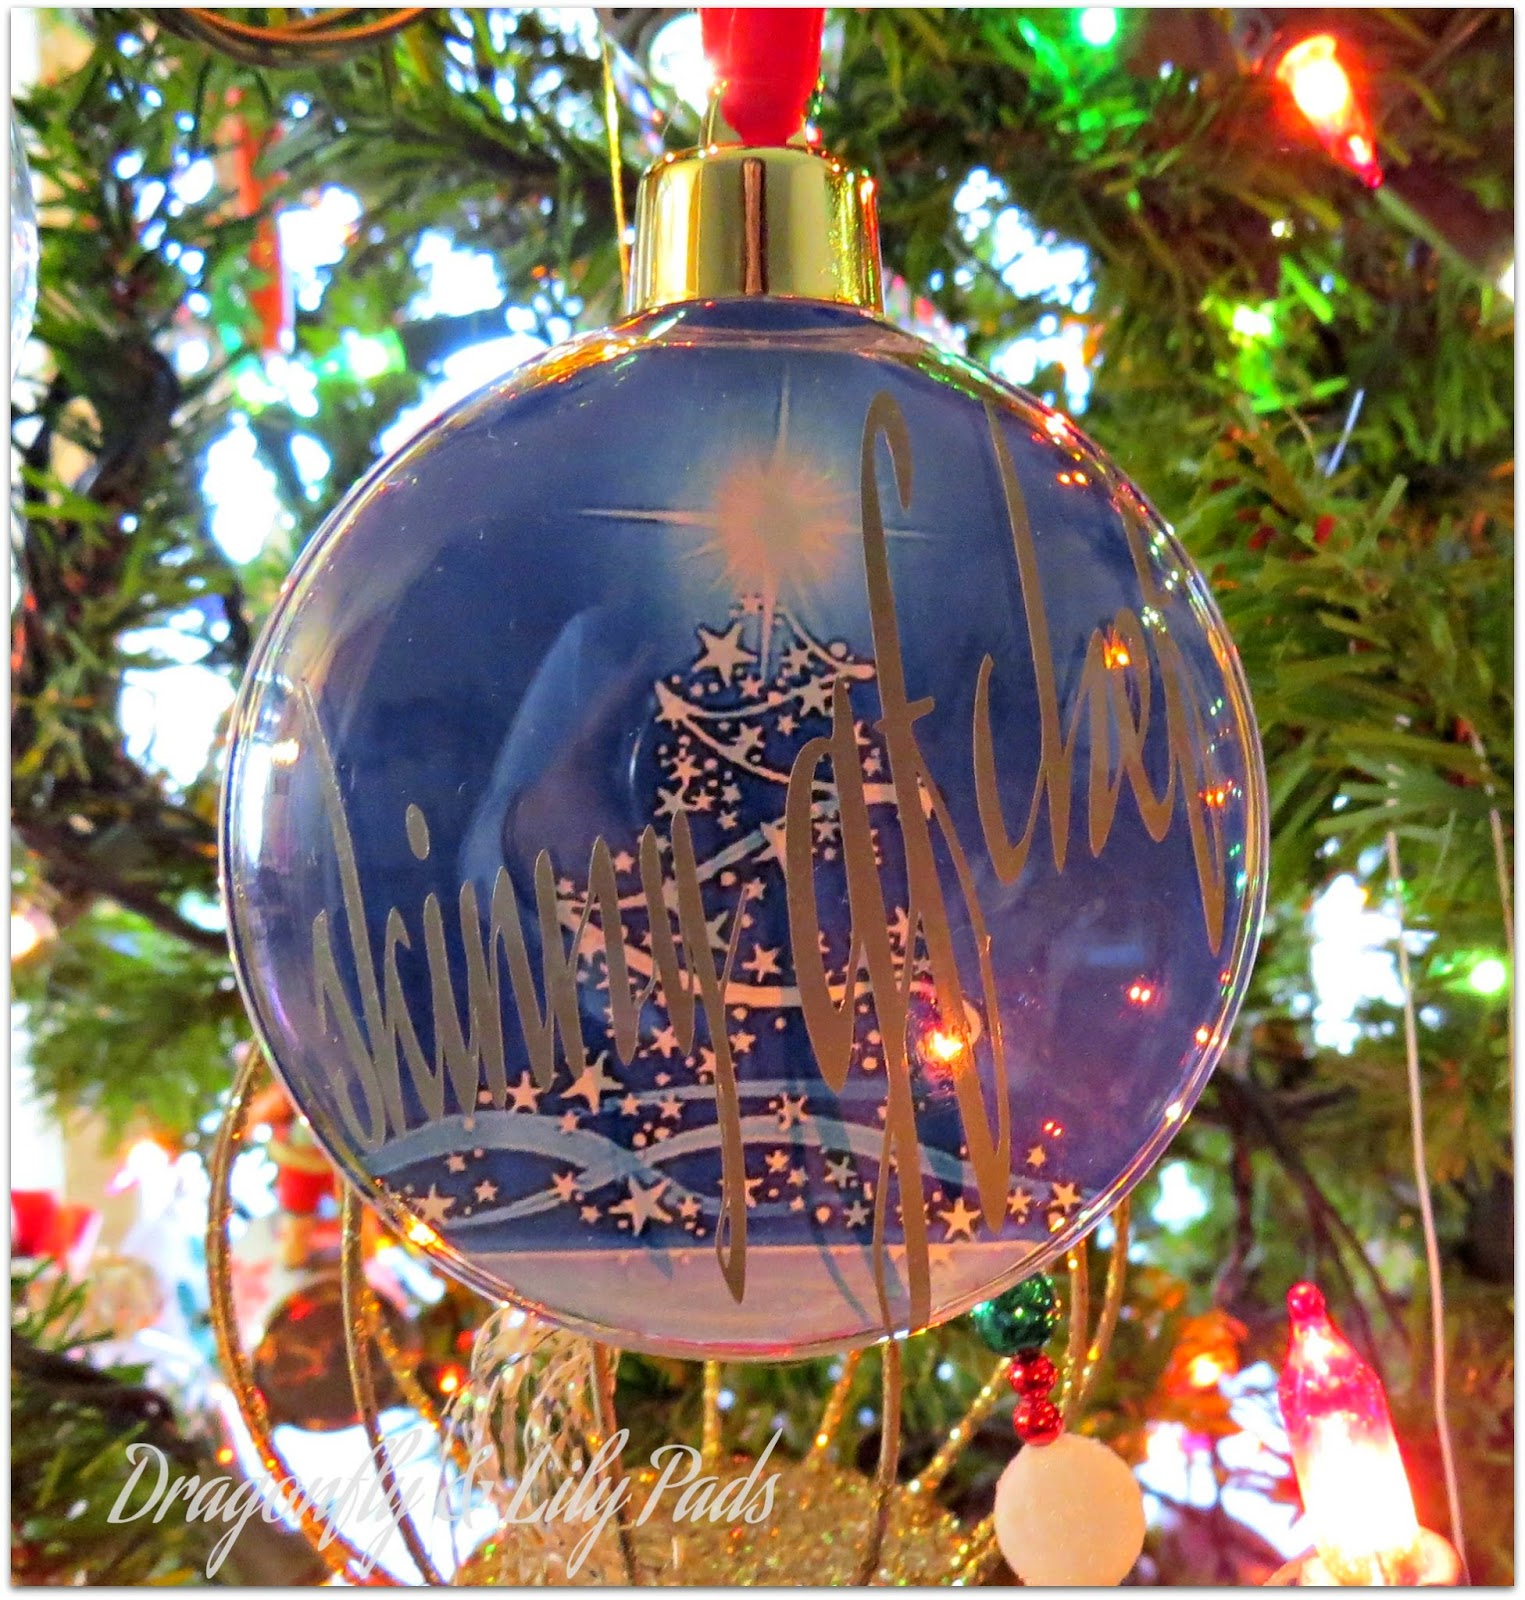
A few weeks ago I made an ornament for an Elf Blogger Gift Exchange with my Silhouette Cameo. In order to keep this crazy Christmas frenzy to short bursts I decided post the tutorial portion of how to personalize an ornament with the +Silhouette America separately. In this case I created a design to look like my friends blog logo. +Skinny GF Chef Ali Williams cooks gluten free for her family and shares her recipes and tips on her blog. As I have only met her on Face book so far we exchanged information, learned about each other, and are building a nice friendship.
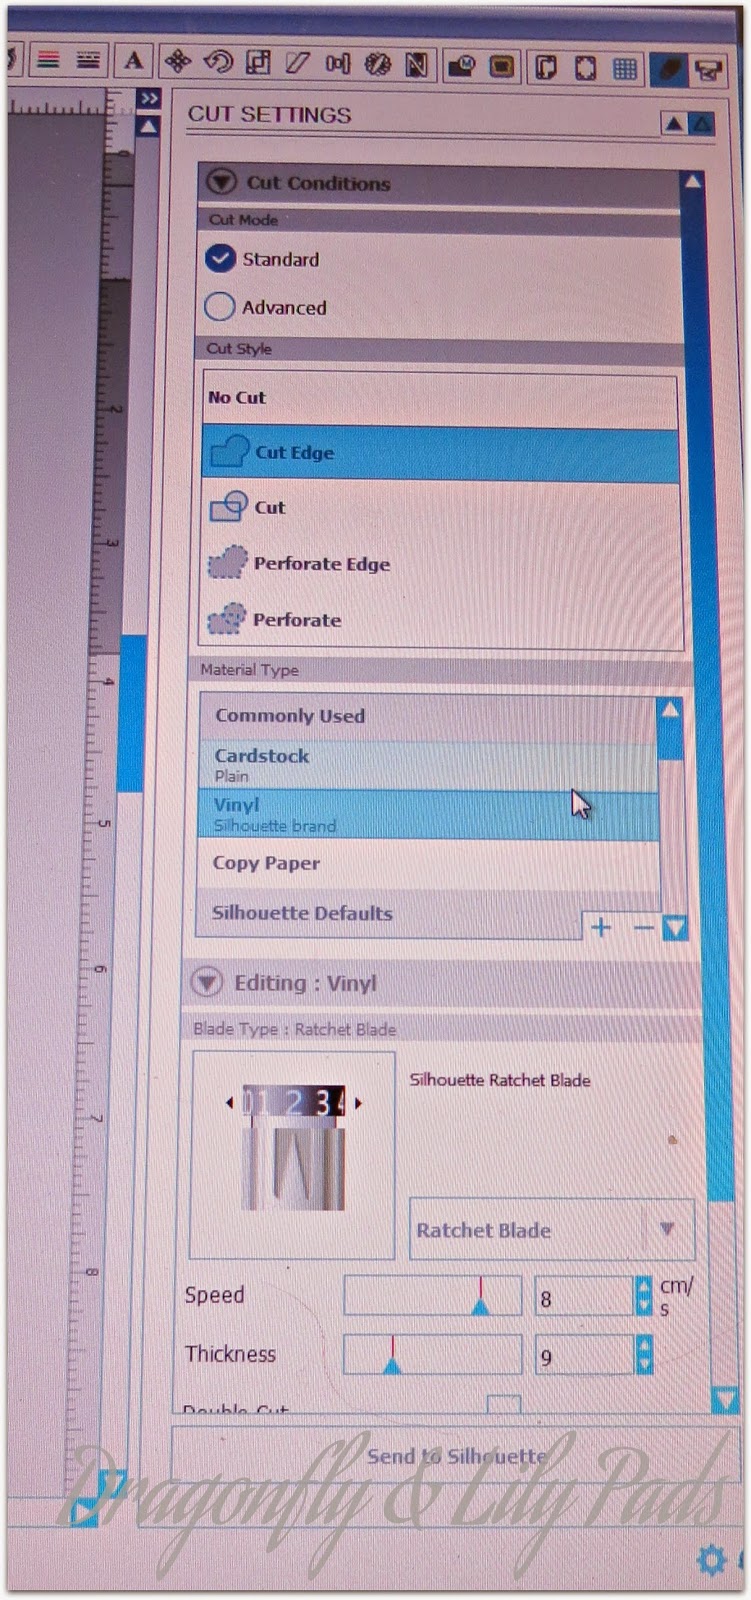
These are the recommended cut settings I used to cut out the adhesive vinyl from Silhouette.
I trimmed the piece of vinyl to create a smaller area, weeded and preparing to use Glad Stretch and Seal as a transfer sheet to move logo onto the ornament. Take the transfer sheet and gently lay it on top of the lettering. Once you have it laying flat with no wrinkles press ans smooth the piece until it has adhered to the vinyl. Take your time with fine lines and many details this can cause your work to shift our become misplaced easily. Now that you have burnished it with a smooth edge slowly lift up in a small area to make sure it attached to the transfer material. As you continue to lift I ran the flat spatula tool from under the lettering to assure i was getting all the layers removed at the same time.
I simply laid the layers of lettering and transfer material center on my ornament and carefully picked up the transfer at the corner slowly removing the logo until I came to the end. I chose to go at an angle because I wanted to use the color lettering that she used in her logo. I feel that it brought more to the complete design this time. I am pleased with the finish gift and I hope Ali loves it too.
Three Recent Post you might enjoy
Welcome to Our Christmas Home Tour
Elf Gift Exchange Bonds Bloggers
Silhouette Challenge Personalize Ornament & Giveaway Ends Dec. 15th, 2014
Please Join me in welcoming The Bloggers Christmas Series to the blog today.
I invite you to give them some warm holiday cheer while they share there Christmas Spirit with us.
A few weeks ago I made an ornament for an Elf Blogger Gift Exchange with my Silhouette Cameo. In order to keep this crazy Christmas frenzy to short bursts I decided post the tutorial portion of how to personalize an ornament with the +Silhouette America separately. In this case I created a design to look like my friends blog logo. +Skinny GF Chef Ali Williams cooks gluten free for her family and shares her recipes and tips on her blog. As I have only met her on Face book so far we exchanged information, learned about each other, and are building a nice friendship.
To begin this project I purchased vinyl, used a font similar to Ali's logo for her blog, and of course my trusty +Silhouette Cameo.The picture above shows you how I check my measurements to be sure they are accurate when fitting a piece securely to another base. In this case the vinyl will be added to the ornament.
I trimmed the piece of vinyl to create a smaller area, weeded and preparing to use Glad Stretch and Seal as a transfer sheet to move logo onto the ornament. Take the transfer sheet and gently lay it on top of the lettering. Once you have it laying flat with no wrinkles press ans smooth the piece until it has adhered to the vinyl. Take your time with fine lines and many details this can cause your work to shift our become misplaced easily. Now that you have burnished it with a smooth edge slowly lift up in a small area to make sure it attached to the transfer material. As you continue to lift I ran the flat spatula tool from under the lettering to assure i was getting all the layers removed at the same time.
I simply laid the layers of lettering and transfer material center on my ornament and carefully picked up the transfer at the corner slowly removing the logo until I came to the end. I chose to go at an angle because I wanted to use the color lettering that she used in her logo. I feel that it brought more to the complete design this time. I am pleased with the finish gift and I hope Ali loves it too.
~Let Your Creative Spirit Dance~
Until next time,
Karen Marie Kedzuch
Fly along my blogging journey with me (Click links below to connect)
Subscribe to Dragonfly & Lily Pads
Welcome to Our Christmas Home Tour
Elf Gift Exchange Bonds Bloggers
Silhouette Challenge Personalize Ornament & Giveaway Ends Dec. 15th, 2014
Please Join me in welcoming The Bloggers Christmas Series to the blog today.
I invite you to give them some warm holiday cheer while they share there Christmas Spirit with us.


8 comments:
Wow...great job. I could learn so much from you. I want to do a craft weekend!
This is so pretty and it reminds me that I show dust off my Cricut and get busy! Merry Christmas!
Wow, I've always wanted a silhouette - I'm jealous! Seriously, you did a great job and the chef is lucky to have you as a friend! I think it looks very elegant. Great job!
xoKathleen
Someday I'll get a silhouette. I love that ornament.
Deborah Sommerlot,
It is a deal Craft weekend plans and Nov. Birthday lunch. Then you can teach me a few things too.
Happy Creating,
Karen Marie
Sandra Lee,
I am sure you are busy Creating something for Christmas. Thanks for visiting and the lovely compliment.
Happy Creating,
Karen Marie
Kathleen,
You are so sweet you make my heart smile. I Love my Silhouette Cameo. It is one of my favorite ways to bump up my creations a few notches. Thank you.
Happy Creating,
Karen Marie
Jeannie,
I hope you do because I love creating with mine. It helps me challenge myself to get better at producing and designing projects. Thank you!
Happy Creating,
Karen Marie
Post a Comment