Magic of Christmas

Thursday, December 19, 2013


      May you be Touched with the Magic of Christmas                                                                                                           

The little red stocking tucked in there can you see ?  That came home from First Grade with me. If you look really hard a bit of yellow paper is peeking out of the top. I used a pencil and wrote a note; 
              Dad
           I Love you. Merry Christmas!
                                    Karen
My Mom must have saved that treasure for me. I must say I am puzzled because, where is her note from me? 
              Mom 
            I Love you. Merry Christmas!
                                      Karen


  This is our white tree a tribute to Christ. 

Some of our decorations are on injured reserve because this little lady took a trip over the curb.

 So with broken elbow, one arm, a charming husband our guest will surely give us a break. When in pain you must have a sense of humor.


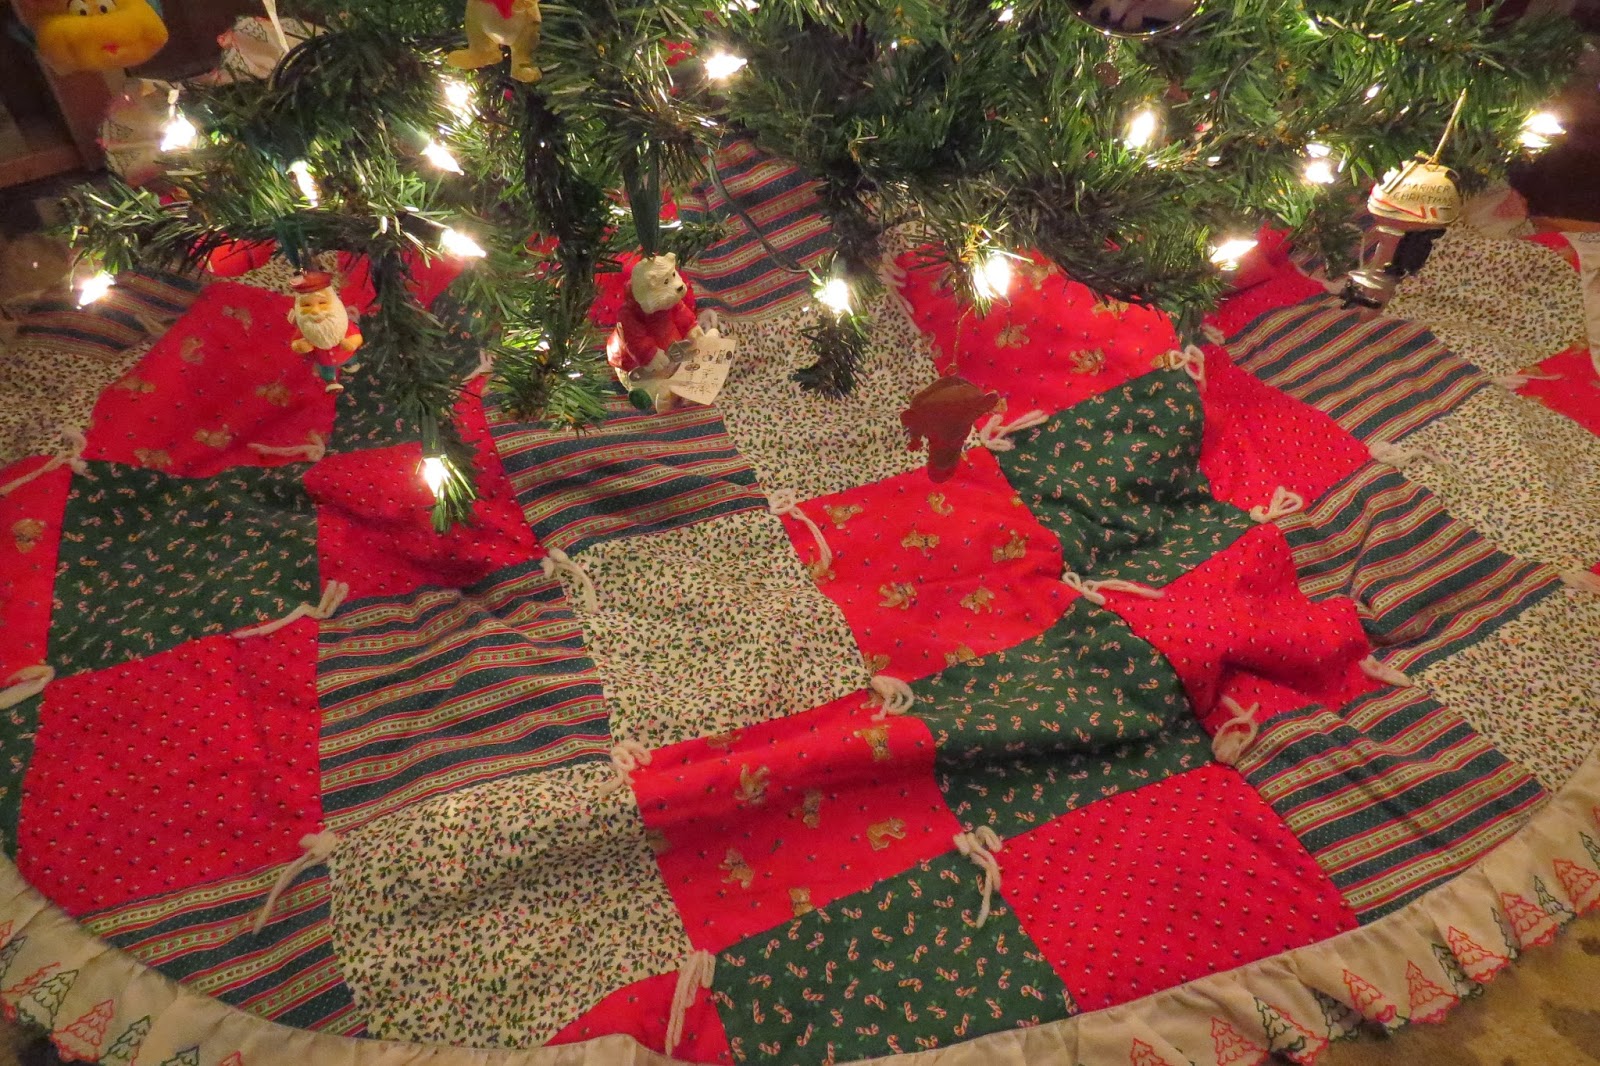
This tree skirt took only zigzag seams, a round Lace tablecloth, and a remnant of taffeta to make just what my Christmas tree needed.
 I bought the tablecloth on a after Christmas Clearance Sale, and
 a remnant of blush taffeta. If you haven't noticed yet, I am an estimator, so I do not know how much fabric I needed on this one.  At first I had over thought how to make it but, it turned out to be easy. I used the tablecloth as a pattern to cut the taffeta, making sure they were both right side up. You may want to pin the fabric together so it does not slip. Take a good pair of scissors cutting the taffeta around the tablecloth to the same size. After I cut the shape, I folded the fabric in half, then into quarters to find the center. Holding the fabric I pinned through two layers on the fold and laid out the fabric in a circle again. Be sure to only cut only the two pieces of fabric pinned together to make the slit in the back.  I knew I had plenty of extra fabric to puddle under the tree so I did not need to worry about closures. After everything was pinned I used a tighter zigzag stitch on my sewing machine sewing around the entire outside and the slit. Make sure your thread matches the tablecloth so your finish is best on the top side.
 I was done in less than an hour.

Now I have a Beautiful place to display my nativity under my tree.


Merry Christmas!
Do you have any special traditions?
How do you Celebrate Christmas ?
How many celebrations do you go too?
Please leave your thoughts because I love to see what you think or if you have any suggestions.

You might even have an idea how
I can stay on my feet?


It is Beginning to Look Like Christmas

Monday, December 9, 2013


http://wp.me/p3Su5W-3dv
    The house has been a flurry of activity since Thanksgiving. There has been family from out of town, visits to museums, birthday celebrations, and finally decorating for Christmas. I have viewed many of the Holiday House Tours, which are absolutely gorgeous. I thought it would be fun to do a little tour of my favorite Christmas decorations in our home I hope you all enjoy the homemade,  memento filled, Christmas sparkle of our home.
//draft.blogger.com/blogger.g?blogID=6275328964382338505#editor/target=post;postID=5940895965694849715;onPublishedMenu=posts;onClosedMenu=posts;postNum=0;src=postname
I made this Tree Skirt for our First Christmas, 29 years ago
 The ornaments on this tree represent, experiences, milestones, hobbies and favorite things for our family. This tree resides in our sun room which is one of my favorite rooms in our house.


 This little angel has been with us for 29 year too. She sits on top of our tree made from scraps of lace, muslin from the backing of the tree skirt, Gold stitching says our family name and year we were married. Under her skirt is a piece of card board shaped into a cone, it was a Welcome Home sign to greet us, when we arrived home form our honeymoon. I made dolls for my nieces, and that is the fabric for the face and arms. Her face is embroidered, and her hair is left over yarn from an Afghan my Mom made for a shower gift, stitched by hand to her head. Her wings are doubled fabric stitched with zigzag trim. She hasn't age a bit for all the years she has spent topping our Christmas tree.


The Garland looks like a Cross Stitch of Buttons and Thread

Hallmark Corporation may want to send a
thank you card for the advertising. (Ho Ho Ho)

  An original window from our home rest on top of the mantel year round, along with candles. For Christmas we have added some sparkle, nature, stockings and a sprinkle of blue. Three of the items are made by artisians. First +Deanna Guzzi owner of The Artistick Studio, Inc. made the nature inspired metal pots with stamping, burlap, pine cones and sphere of moss. Next +Diane Gutenek made the Forget Me Knots metal print art, with added embellishments of ribbon, and white flowers from antique hats.


This basket of Greens, red Berries, which includes battery power lights with timer switch can hang outside or be used indoors. In my sunroom it is working hard to cover a power cord, printer and hide a speaker. It was bought in Mt.Vernon, IL at a local craft fair in the fall.

These are Panda Bears stand guard in the hallway to escort you to the rest of the house.


 We are still working on decorating, look for another post as soon as we finish the rest of the rooms. I hope decorating for this special time of year is filled with warm memories, of loved ones here, and in spirit.
 I look forward to your comments and suggestions.

Tis The Season Nifty Thrifty Gifts

Thursday, November 21, 2013

     Tis the Season to find creative ways to give gifts to friends and family that are well made with love of course and useful. In this economic time we are all looking for ways for our gift budget to stretch as far as we can but we still want a thoughtful gift. Last week I went to the Dollar Store to see what I could find for my gift giving project this year. I have to say the thought crossed my mind to use one of the many cost effective gift ideas I have seen on the other blogs, Pinterest, Facebook, Google+ but , I wanted an original idea.
   I shopped around and found silver, metal, mesh, pencil holders. Ahh! This would be my container for the gift. Then what would I put in the holders along, with adding a my creative design, to make this a special gift?
 I spotted the butterfly type paper clips 8 count in the large size and 10 count in the smaller size.
The last few items I need for this gift I already have in my stash at home. Yippie! I have a plan, a nice gift to give, with a little of my creative love thrown into a pencil cup holder.
Can you guess what the gift is yet? Hmmmm. By the way the last few items are scrapbook paper, glue, twine, and I will need to purchase some tulle to use for wrapping because I think it will add a nice touch. I will show you that later on another day.
 Yard Sticks have Character
 Now I need to measure the large and smaller clip, to figure out how much paper I will need, for each size clip.* Disclaimer your paper clips will need to be measured because sizes will vary.
Here are the measurements for the two size clips I bought at the Dollar Store. The Large is 1 5/8" wide, the smaller one is 1 1/4" wide. Now I need to measure the length of the paper I need for each, after some trial and a lot of error. I found that cutting a strip the width of the paper, wrapping it around the clip, making a indent with my finger nail by pressing the paper tight into the top of the clip. This gave me a good place to start. Then I cut the paper a few times until I found just the right measurement, 2" for Large, and 1 5/8" for the small. Out of one 2" strip of paper in 7 different color I was able to make 35 clips. Out of the 1 5/8" strip of paper also using 7 different colors I made 49 clips.

I bought this at Micheal's on Sale
I used my paper cutter to cut out the sizes needed. You can use scissors but it is a lot of cutting. I thought about using my Silhouette paper cutting machine and might in the future now that I have the measurements calculated. I plan on cutting all of my paper out mixing the colors and patterns. I used 7 smaller patterns because large patterns would be lost on this size project. I choose paper not card stock, because it would be to thick to work with folding around the clips. Below is an example of the papers I used. I thought the patterns and colors would be a bright spot on a desk or in a craft room.


Bright and Cheerful Colors

My next step is covering the black clip with the scrapbook paper. I uses E6000 glue on the Large clips, because the paper did not fit in my Xyron. Bummer, I should have bought the bigger Sticker maker. Christmas present for me???  I did use the Xyron permanent sticker for the small clips. It took less time, was less mess, and turned out nicer, in my opinion. This picture shows the paper cut ready to be glued to the clips.

How do you like the finished Clips?
Now I filled the pencil holder with 10 small plus 4 large Fancy clips. Add some Colorful twine to the container. I will wrap with the tulle, twine and a gift tag later.  Here is the final product. Would you like to use these on your desk? Some people even use these for clips to close open bags of snacks,, or chips too. Then I would keep the container in my kitchen, near my Ziploc Bags, Foil, Wax Paper.                                                                                            
A view from the top

Front and Center
    When ever I start  project the ideas still bounce around in my head. I am going to make a few variations of this project in the near future. Do you have any suggestions? I already know I am skipping the E6000 glue on this next time. Great product but not the right one for this application. I also tried Washi Tape on this one and that was not the best for this project either. I am thinking of attaching magnets so you can use the clip to hang something. What do you think of that idea? Share your thoughts on these ideas or any suggestions. I look forward to seeing your comments.
I am Blessed my family is at home.  My cousin, with his family will be here tomorrow.
I am a happy girl!!!!
Happy Thanksgiving!

Here is a list of items used and where I purchased them:
Dollar Store
 1 package Butterfly paper clips Small 10 count  $ 1.00
 1 package Butterfly paper clips Large 8 count    $ 1.00
 1 Pencil Cup Holder ( Wire Mesh Silver)           $ 1.00
 Michael's
 I used Xyron Permanent Sticker
 Scrapbook Paper
 E6000 glue
 Steals.com
 Twine
http://wonderfulathome.blogspot.com/2013/12/wonderful-wednesdays-15.html?showComment=1386202147418#c2527398334266671696

Not So Pretty Picture

Tuesday, November 19, 2013

Making Lemonade out of a Lemon
While I have been tearing my hair out to get this blog written, you might have wondered where did she go? Well I have been here trying to get my computer repaired. Yep you guessed it the dreaded virus. Which ironicly we both had viruses, mine required rest and medication. The computer a complete over haul. It occurred to me last night, after writing, and scrapping the first draft of this post that I was looking at this dilema all wrong.
  I have no pictures and I promised my family I would not talk about them in the blog. I am using one pinky to write this on my phone and I can barely see what it looks like. Most important to me is that I am only one month into this and letting people and myself down.
 So I do have pictures on this phone. I do have something to write about and I still have a pinky finger and a phone. So please have patience with me while we get through this little bump in the road.
  Let's see what is important, that is lost in this mess. Well of course my 25,000 pictures, time, all 181,000 documents, for a fundraising auction I volunteer to help my sons college baseball team, my Storybook projects, Silhouette projects, and this blog post.
  No
Our Cricket dinging the beach as much as me

The beautiful Fall colors

The last Roses of the Summer at my parents

 Arriving at the lake after a long week
The sun setting on a day our whole family was together

My favorite spot to enjoy the view
  There are so many more moments you will see along our journey. These are just a few of the memories and treasures locked up in my computer. I hope you will all back up your computers now so your treasures will be safe. My son taught me last night to simply open your choice of storage device, then open another window  click on your files and click copy.  Now go back to your storage device click paste. Depending on the amount of content in your files this can take a long time. I did one over night but it can be done during the day too, you will just want to have a project or something to do so you can use your time productive. My kind son is now spending his day repairing my computer. I am blessed to have a loving and supportive family in my life.
The sun is shining here, it is Cricket's 3rd Birthday, and time for me to take an adorable furry girl shopping for some presents. Why? Because that's what girls do, on their birthday, in this house.  Have a great day and please share your computer crash stories with me. I know we have all been through it sharing just might make us all feel a little better.

Gathering Memories

Monday, November 11, 2013

      One of my favorite spots is the Chicago Antique Randolph Street Market. I started going several years ago in the Summer with my husband, it is our date the last weekend of the month. You are probably wondering what we would do at the market, but once you go on a Saturday or Sunday, you will never ask that question again.
Fall at The Randolph Street Market
 You will be hooked! As you wind through each booth, meeting vendors, shopping, listening to the music, and enjoy the food & beverages, you too will begin to be woven into the Markets Huge Family Quilt.
Me enjoying a refreshment in my new hat
 Today is about a finding a piece of a childhood memory. Did you ever have milk and dairy products delivered to your house? My family home was within a block of Willow Farm Dairy. When I was young the milkman delivered milk, daily to our house in a milk box. It had a flip up lid, was dull gray insulated metal, with Willow Farm Products embossed on the front. It sat outside right next to the backdoor. Which to me seemed like a place of honor, because the kitchen was just inside, and we all know the kitchen is the, "Heart of a Home". Of course back then the whole neighborhood came to that door because, "Back Door Friends are Best."
  One of my favorite memories involving the old milk box was when we would go swimming in the back yard. No one was a loud in the house until, we dried off. So my Mom would tell us to sit on the milk box, or back step, to dry off after swimming. As I remember two of us could fit on that milk box, and the rest of us would overflow to the back step.
  One Summer we were sitting out on the milk box and the back step drying off when  I noticed that the ice cream truck would come at sit at the end of our driveway each day. when my mom would call us for dinner. We never bought ice cream because, we hadn't had dinner, plus it was expensive. It was then that I realized the ice cream man was just hanging out while we, dried off before dinner in our bathing suits.  
 As many things in life the milk box lost its usefulness, no more milk man, our moms bought milk at the grocery store. Eventually the Willow Farm Dairy Closed. The milk box I would guess was thrown away since it had no purpose.
 As an adult I started searching for items from the dairy but they were hard to find. After a few years I was able to collect 2 milk bottles, a cracked butter crock, and a wooden milk crate stamped with the year I was born. This past Summer at the Randolph Street Market, there it was right in the middle of the vendor booths, The Willow Farm Milk Box was in my sight again. My husband bought it for me which made me feel so happy.
 This will be used at parties as a cooler holding ice, with drinks chilling inside. I use the milk bottles as vases, and the butter crock as a candy dish.
Willow Farm Products Milk Box
The next weekend we had a big family celebration, at which I proudly showed my whole family what we had found. My Dad smiled and said that is just like the one we has at our house. 
  I truly love gathering memories, but sharing them is even better! 

Let's stay connected here are links to my blog & social media.


Daybeds inspired by Ana White

Saturday, November 2, 2013

     I have to thank +Ana White for her terrific free plans for the beds my husband built. Each Winter we plan projects for inside our lake house. My husband wanted to build beds for our lake home. I searched everywhere I could think of  to find solid economical beds with storage, when I found Ana White's plans for a twin size daybed with storage. It has six storage cubes in each bed which gave me room to store linens on one side and a space for each guest to store their belongings while they visit. The design was perfect for our guestroom at night and a game room during the day. Please follow this link to get her plans, check out her site, and while you are there she has plenty of plans for many projects.
http://ana-white.com/2009/12/plan-stratton-daybed-as-request-by-you.html
 First we studied her list, changed the wood to oak sanded plywood, because we planned on staining it with Minwax Stain and Sealer(Ebony), and Ana painted the bed White. Then we added up what wood we needed for two beds, which was easy because instructions included a detailed cut pattern. We purchased the oak sanded plywood from Home depot for the body of the bed, and the facing was oak as well.
  I was concerned about keeping the cost to a down. After giving the design a bit of thought I realized we could save even more money if we bought the cheaper pine sanded plywood for the inside of the cubes. The pieces that we cut out of sanded pine plywood included: Three bottom cuts, 4 sides of boxes, and 3 center cuts for each
Look at the cube in the background and top of bed on table.
Original Design complete
  My husband followed Ana White cuts, supplies lists, and directions exactly on the first bed. We changed the cut pattern on the second bed to the make cutting, staining and painting easier. We tried making the top on this bed one piece of wood instead of three separate pieces. This way my husband was able to paint the bottom or inside of the cubes Oatmeal on the inside and stain Ebony on the top, ends and facing.

Close-up of bed 
The beds made but the room is not yet complete.
You can see the daybeds in our guest /game room.
I added pillows that  I made to ones I purchased. I also bought Colonial Mills round baskets to add colorful  storage. I am still working on the bedding and decor of this room. I post more pictures later when I finish the guest/game room. I think Ana White will be proud my husband made these beautiful daybeds using her plans. We already had some guest stay over they gave the beds rave reviews. Please Leave a comment to let me know what you think of the beds or about Dragonfly & Lily Pads. Thank you again to Ana White for the wonderful plans hop on over and check out her site too.

That's Entertainment

Thursday, October 24, 2013


   We had been searching for a entertainment center for our great room at the lake house. I found the perfect one, except for the $$$$. It had white framing with the top, drawer, cabinet fronts, and legs in different stains of wood, with mismatched hardware. I scoured the Internet to find a deal or a substitute, but it wasn't comparable in structure or materials even though I met one goal of lowering the price.
  At a local antique store I scored this marked down buffet. It  was the answer to my entertainment center quest within my budget. It had a few blemishes but seeing past the issues was my vision of our entertainment center.
Before

After checking my supplies, I made a list of items I didn't have in my stash from other projects. I drove to our nearby Lowe's, which is a good resource for gaining knowledge, and bought my supplies. I began the process of  removing the knobs and hinges, taking  care to mark them because the wrong one may not fit properly. 
Next I sanded the top, doors, and center drawer front until all the paint was removed, and then the remainder of the buffet enough to rough up the surface to paint . We measured the opening for each shelf. My husband cut two shelves from oak plywood with his table saw, then drilled a hole through the back of the buffet between the two shelves for the cords. I used my new iron for the first time to iron on the oak facing to the shelves. Then I used Ebony stain(top), walnut stain(doors)and drawer front. Tape off the edges to insure clean lines to paint the frame, shelves, interior and legs with Linen paint.
After
  I was able to use this piece of furniture to blend the colors of wood
in my other furnishing throughout the space and
compliment the white painted trim in our home.  

Now That's Beautiful Entertainment!

Supplies                                                         @ Home Stash
Veneer facing Roll                                          Paint brushes
Black & Decker Orbital Sander                      Minwax Stain and Sealer
Sandpaper 80, 120 & 220                               Oak Veneer Plywood
Sanding Sponge Blocks fine grade                  Painters Tape
Latex gloves 
1 Quart Linen Paint                                                                                                                                                                          
These purchases proved to be such a mess, I switched to the sander
disposing of all these products;
Chip Paint Brushes, Rubber Gloves, Scrapper, Metal Bucket,
 Natural Paint Stripper

I look forward to your comments, please share your ideas too.

Something New

Wednesday, October 16, 2013

               Something New
                            
   The title of this blog today is Something New. Which seems like another day to most, but to me it is about the turn of a page, white with no words, directions, or calender.
 So what I am going to do about this blank page staring back at me? I am starting something new please join me on my blog.
 Dragonfly and Lily Pads is going to share ways to make your house, apartment, condo or dwelling into a home. I will show you how to fill your home with comfort, love and your story. Blending the new fresh trends, with trinkets along with pictures creating memories, and space to honor the past, with family treasures mixed in to create a place called home.
 This will not have recipe, unless it involves how to age a piece of new lumber. I have the tools, knowledge and skill to refinish, rebuild, remodel, reuse, or build furnishings. While knowing when to splurge purchasing key long lasting basics, keeping budget in mind at all times.
 I would be honored if you take the time to start something new with me. I can only imagine the possibilities.