I am working on sprucing up my lake front this year after the dreaded Ash Bore took hold of our two Ash trees and now week have a naked waterfront. Not to embarrass the neighbors I decided to add some color to our seawall. Jeanette from +Snazzy Little Things - Vintage DIY & Decor Blog has been running a 30-day challenge. Terracotta Pots is the challenge for this month. Since the lake weather can be pretty harsh I opted for Terracotta AKA (Plastic Pots).
Plastic pots do not look as lovely, but the will hold up better in our environment. Drop and Plop flowers from +The Home Depot
I did purchase one more item or actually two decorative trellises for height from +Lowe's Home Improvement
I found the rest of my supplies in my stash.
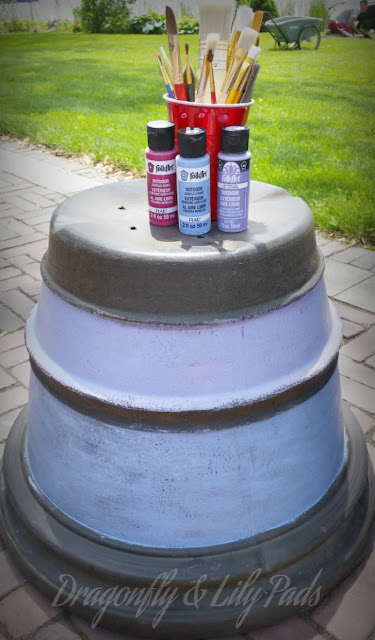
FolkArt Patio Paint 3 colors
Paint brush
Paper towel
Plastic cup for water
Frozen Dinner tray (paint pallet)
As you can see from the picture I painted the light blue on first and then the hot pink. I was not happy with that look so I coated over the pink with a soft lavender. Still not convinced this was the look I was going for I mixed blue with the lavender on the bottom stripe. That is when the blue looked too washed out so I added a second coat of blue paint to the top stripe.
As you can see from my supply picture I also drilled a few drain holes in the bottom of both planters. I did not want my flowers to get flooded in water. Next We moved the planters to the location I wanted them on the seawall. If you are wondering why I am saying we that is because, Prince Charming is in the background fixing the fire pit. I will share more about our lake home yard improvements another day. He helped me hauling the heavy bags of rocks to add weight to the planters and +Scotts Miracle-Gro Moisture Control Potting Soil
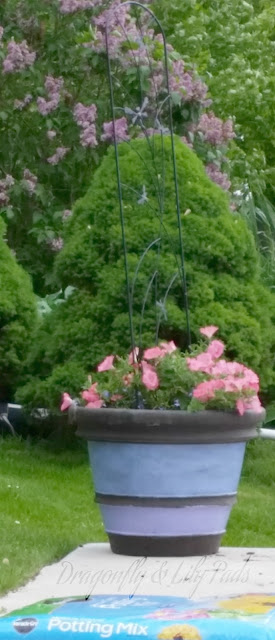
Prince Charming filled the pot to the top of the lavender line to weigh down the pots. The wind often blows over our furniture and our swing so we did not want to find the planters in the lake. We then poured in the soil until we estimated the bottom of the flower pot. Popped the flowers out of the pot, plopped them on the dirt, filled in the dirt between the pot and edges of the roots.
I separated the plants to push the trellis in the pot without breaking stems off the flowers. I also packed more soil to add stability to the trellis.
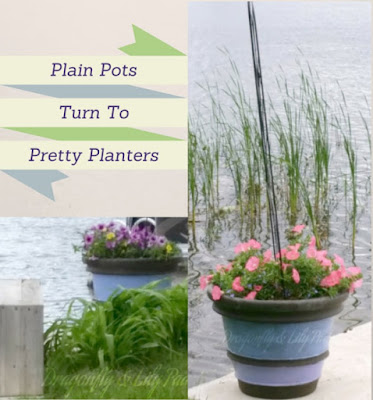
Our neighbor stopped by today to tell us how much he liked the new planters. He said that he thought it really softened the look of the seawall. Is there a better compliment? I am very pleased the simple addition to our lake home. As far as I am concerned this little project produced quite a bit of beautiful for a small amount of work.
You know the drill here are my links, please take advantage of them so I can keep in touch with you. Please follow the Links below and share what you have been inspired to create. As always I love to read your comments so don't forget to write!
Fly along my blogging journey with me by linking up below.
~ Let Your Creative Spirit Dance ~
Until Next Time Happy Creating, Karen Marie
More Post to Enjoy:


7 comments:
How appropriate that your trellis has dragonflies! :) Nicely done!
Laurie Jean,
Thank you so much for visiting me today. I was surprised to see them the trellis as the store.
Happy Creating,
Karen Marie
Very cute. It's amazing what a little paint can do.
Shannon @ Bohemian Junktion
Shannon @ Bohemian Junction
A little color goes a long way doesn't it. Thanks for you kind support.
Happy Creating,
Karen Marie
Karen, I really love what you created with some paint. I see yucky looking planters and just walk by them. But you have shown how easy it is to give them a new life! Well done!
Thea Morris,
thank you for your sweet words. I can not wait to see what your talented eye does to some of those planters. Lake living is not kind to terracotta or the more delicate planters. Now I can have a pot strong enough for the elements and pretty for me.
Happy Creating,
Karen Marie
What a great idea to add a little trellis to a planter! I'm going to have to try that out on our back patio next summer...and paint the ceramic pots we have that are looking a little weathered!
Post a Comment